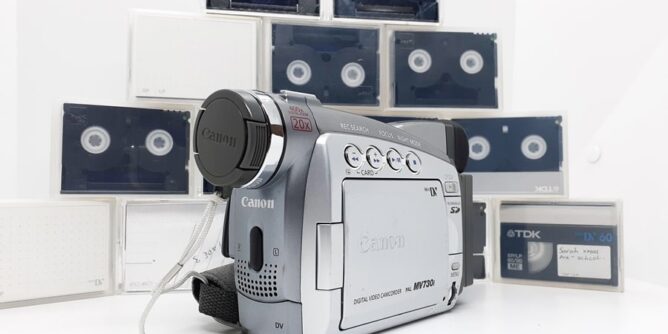
When it comes to capturing old Mini DV tapes there are countless paid softwares out there that can capture the footage with little to no problem. But I wanted to test for myself trying a Mini DV capture using free software.
Two to be exact. WindDV is one and Scenalyzer Live is the other. Unfortunately neither appear to have been updated in a long time, nor will they.
The great news is, they’re free and they work.
I’d like to point out that both of these tests were created on a PC running Windows 8.1, and require a FireWire PCIe card in order to capture from a Mini DV camera.
That being said, I cannot tell you if either of these software will work on Windows 10.
Easy Methods for Capturing Your Videos
Nothing is easy.
We are getting to a point where people want devices or software to work straight away with no hiccups. I get it, I’m like that too, but sometimes when trying to use older software on newer PCs you are going to encounter issues.

If something isn’t working straight out of the bag using free software, don’t simply give up and throw away the tapes. Frustration can lead to really bad decisions.
You just need to find a work around, and if that fails? Maybe just rely on paid software.
There are other free softwares, such as Virtualdub and another version known as VirtualDub2 or even VLC , all three which I’ll be testing soon. But in order to get the best results (and enhanced results) these types of software require configuring certain parameters and possibly adding filters to enhance the image.
WinDV and Scenalyzer Live will only do capture.
Walkthrough of WinDV
The first capture software in the test is known as WinDV which is an open source software and (dare I say it) last version was dated 2003. It’s last supported OS was XP, but don’t let that put you off, it worked fine for this test.

Created by Petr Mourek, WinDV is portable and doesn’t need to install on your PC. While it is limited in what functionality it can offer, it’s ease of use is fantastic!
Open the application. Plug in the camera / press play. The image appears instantly.
Now again this could be working for me because the capture card is updated or because I’m running on an older OS.

The application mainly consists of a preview window that syncs with the camera in real time, but in a limited fashion. You can select Capture and the camera will play back the tape, recoding the footage to your computer. Selecting Capture again will pause the tape.
There is an option to save the files into a selected folder, otherwise if left blank, it will save the files onto the desktop.
So it’s basically an on/off mechanism.
The video quality while capturing in no way represents the actual final captured videos. The final video quality is excellent.
While there is an option to send AVI files to a MiniDV camera (under the Recording to DV device tab), I didn’t see a reason to add that in this article.

If we take a look into the Configure Settings there are options to change the AVI into type-1 or type-2. What that basically means – if you wanted to split the video and audio for easier editing. I’d recommend a page from Microsoft that describes the difference in detail.
Other options you might be interested in altering is the file size and renaming the file formatting.

Keeping the filename format the same, we can see the clips are saved as year/month/day and the hours/minutes, which makes sense if you are definitely wanting to edit certain segments.
The above example also shows that each separate clip will be saved as it’s own file.
If you were wanting to create a DVD from these files you could simply add them into an editor and burn the disc that way.
Walkthrough of Scenalyzer Live
The next free software is called scenalyzer LIVE, which like WinDV, is no longer offering any updates. This software worked for me using Windows 8.1.
While the product name means analyzing scenes, it just sounds like an innuendo these days. Like an Only Fans rip off!

Scenalyzer LIVE doesn’t require any installation. Once the software is downloaded, you can run the app straight away.

There are more options than WinDV that’s for sure.
Along the very top of the application you can change the capture folder directory.
The left hand side there is a fixed preview monitor, which can also be selected as a larger separate preview monitor and moved around the screen to your liking.

Upon closer inspection we can see the driver that is used (which can be selected via the drop down button).
Below that, there are playback buttons to run your camcorder from your computer. You also have the option to record the digital file back to the DV camera.

Once the video has begun playing you can mute the audio if required. Again the video playback quality is lower than actual captured footage.

Something that I do like from this software is the ability to see the captured footage in real time. This allows you to decide if there are useless clips you might want to remove at a later stage.
Once the capture is finished you can drag a scrubber across the various scenes to precise areas.

There is a scene splitter/joiner that allows you to edit individual scenes. To be honest though, all modern video editors will do a much better job. There are also free video editors like OpenShot which will allow you to import the AVI files and create one continuous MP4 video.

Similar to WinDV scenes will be separated into their individual shots, listed in order by their date and time taken.
Conclusion
Due to both of these capture software being long outdated, it’s hard to say which is better than the other. If you find one doesn’t work on your PC set up then maybe try the other. Out of these two, I prefer WinDV as it is straight to the point and captures without connection issues (for this test at least).
While Scenalyzer Live has the option to use basic editor functions, you probably won’t need that in any way shape or form.
If you find other free capture software a bit too over complicated, then maybe it’s worth your time giving these two capture software products a try.

