
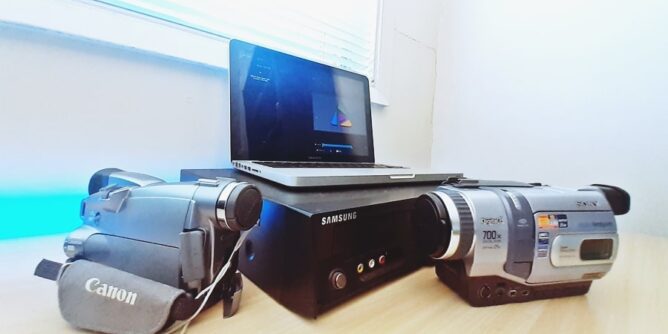
In this article I’m going to cover three popular video formats and explain how to transfer Mini DV, Video 8 or VHS to Mac using a software called LifeFlix. Each video tape was transferred using FireWire, including the VHS tape, as I wanted to see if it was possible.
And as you’ll see, it is.
But first, the bad news! There’s a good chance you may not have the devices I used in order to make this happen and if you don’t own the cameras I used (or similar) then you’ll probably be back to square one wondering how to convert your video tapes to a MacBook.

If you’re adamant that you want to import your videos strictly on your Mac computer/laptop then I hope the following will give you encouragement (and maybe new ideas) how you could transfer your old home videos.
I created a video of the same process here.
Importing Mini DV Tapes to Mac
For some reason when it comes to transferring videos to digital using a Mac, most videos I’ve seen only seem to cover the MiniDV format to transfer. So let’s start with that as well.
In order to import any tapes I am using LifeFlix software. There is a free trial version you can use to give you an idea of the quality and if it’s easy enough for you to use. Short answer to that, it is. It’s awesome and it will be the benchmark I’ll be using when testing future Mac video transfers.

Something to note the test camera I use is a Canon but I do have a Panasonic model as well. The reason I brought that up as their is a slight bug issue if you are using Catalina OS (which is what I conducted these tests on). For me, (the bug issue) is not a big deal at all and I’ll explain more about it a little further down.

The MacBook Pro I use for these tests is a mid 2012 i5 2.5Ghz. Certainly nothing compared to what is available these days but at least it has ports along the side that definitely come in handy. Plus it has a DVD drive to actually burn discs for tests.
The middle port is the FireWire connection that I’ll be using. If you have a more modern MacBook Air you will need to buy several thunderbolt connections in order to transfer from MiniDV tapes.


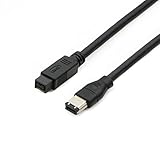
- IEEE 1394b Firewire 800 cables are perfect for connecting your new Firewire 1394b devices to your legacy 1394a ports.
- Provides data transfer rates up to 800 Mbps. Supports Plug n Play , Hot Pluggable.
Last update on 2024-04-27 / Affiliate links / Images from Amazon Product Advertising API
Because this MacBook Pro has a 9 pin FireWire connection, I was able to purchase a 4 pin to 9 pin cable.

The 9 pin connection will fit into the port on the laptop. Just make sure you have it facing the correct way up.

Along the other end, the 4 pin connection will connect into the MiniDV camcorder.
From here make sure to switch the camera onto its VCR mode

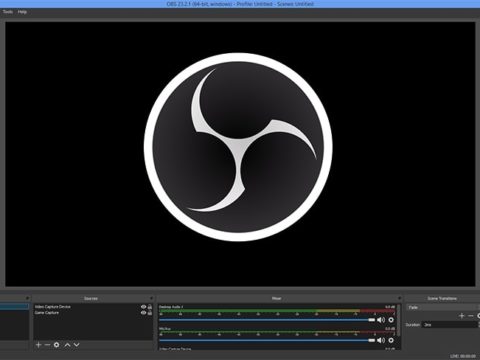
Starting the LifeFlix software, it will be ready to import from the camcorder.
So quickly let me explain this little bug. If you have the combination of a Canon MiniDV camera and are running Catalina OS – the captured footage will not include the sound.
This doesn’t happen to other model camcorders or if you are running another Mac OS, just that lucky combination.
Which is what I had.
The remedy for this issue is to the following:

Click on the Import button. A new window will open where you are required to give the tape a name. So give the tape a name, description is only optional.
Don’t click on import just yet.

Click the PLAY button on the camcorder.
Then click IMPORT on the LifeFlix software.

This way the transfer will include the sound. That’s it. That’s the bug.
You may lose possibly 1 – 2 seconds from the start of the import while the camera and computer sync. But seriously what could you have at the very start of a tape that is impossible to replace? It’s not like you would be missing someone’s wedding vows within the first 2 seconds of a video.
Maybe it’s possible, I don’t know. Do people still do drive through weddings in Vegas?
When the tape has finished, click on Stop.
Quick Walkthrough of LifeFlix Software
As you import the MiniDV tape, you’ll see that new scenes will appear in order of the original recording times. Basically, when someone starts recording on their camcorder that is considered a new scene. I guess that was a selling point back in the day for MiniDV camcorders.

The amount of scenes that appear will vary from how many times the recorded tape was stopped/started stopped/started.
LifeFlix will show those scenes in the original order.

Each scene can be highlighted and rearranged to change the order of appearance. You can also simply highlight a scene and delete it completely.

When a scene is highlighted, that clip will appear in a video player along the right hand side.
Below the player you can edit the clip (shorten the individual clip or split it further) and re-save it as a new clip if desired. At first when I saw this type of trimmer in LifeFlix I thought: not these type of editors again!
But unlike ArcSoft ShowBiz where the editor feels a little clunky to scrub forward and back just to split a scene and doesn’t import from MiniDV, LifeFlix is already working with smaller cut down scenes, so it makes sense that you’re editing or trimming a small scene to start with.
That being said, when I transferred the next two formats I was still back to square one with one long footage to split and trim.
But if you are strictly transferring MiniDV tapes to a Mac, hands down this software is going to be the one I recommend.

If you wanted to combine all the clips together you can by simply combining command + A. You could also select several clips and only combine those together.

Clicking combine will create one larger video file and may take a few minutes to render.

If you were happy with the video file, clicking Convert to HD will render the file. This too may take some time depending on the original size of the video.

The final video will encoded as an MOV file.
Converting Video8/Hi8 using a Digital8 Camcorder
Next on the transfer test is the Video 8 tape. Now for me, I use a Sony Digital8 camcorder that can play back Video8/Hi8 tapes through FireWire.

If you own an older Video8 camcorder, you may want to scroll down to the VHS method (but it still requires another tool to make it work).
Getting these type of Digital 8 camcorders can be a little expensive, but you may have some luck searching Amazon, eBay or Facebook Marketplace. This type of camcorder does make it easier to connect to a Mac through the FireWire port.

- Data Transfer Speeds: 400 Mbps
- Backward Compatible: Connects Firewire 800 devices to legacy 1394a ports
Last update on 2024-04-27 / Affiliate links / Images from Amazon Product Advertising API
Similar to the MiniDV camcorder the 4 pin FireWire will connect into the camera.

The 9 pin connection will insert into the Mac port. And again the steps for starting the import are as follows:
- Click Import on LifeFlix
- Give the tape a name
- Click Play on the camcorder
- Click Import on LifeFlix software

Because Video 8 is a much older format, it won’t break up into individual scenes. A ninety minute tape will be a large file. That’s to be expected.
Once completed, you do have the option to go through and manually split the video into smaller files thus creating your own scenes but that will take time. But all forms of editing take some time.
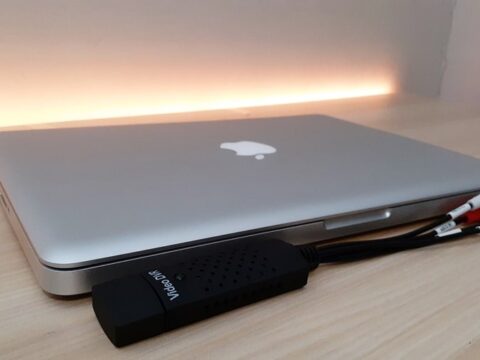
Converting VHS to Mac Using a ADVC 55
Finally let’s look at one alternative to transferring a VHS tape to a MacBook. For a format that I receive the most of to transfer, seems a shame that it’s so hard to find a cheap way to transfer it to an Apple product.

In order for this to work, we have to use a Canopus ADVC-55 which takes an analogue signal and transfers it to a digital signal. There was a device called Pinnacle Studio MovieBox Plus but that only worked up to Windows Vista. So that’s useless.

- Connects to all Widely Used DV and Analog Video Equipment.
- Compatible with Windows and Mac OS DV Editing Systems.
Last update on 2024-04-26 / Affiliate links / Images from Amazon Product Advertising API

You could also use a Canopus ADVC 100 or ADVC 110 for this to work, you just have to find them. I like the ADVC 55 because it can be powered through the FireWire port itself.

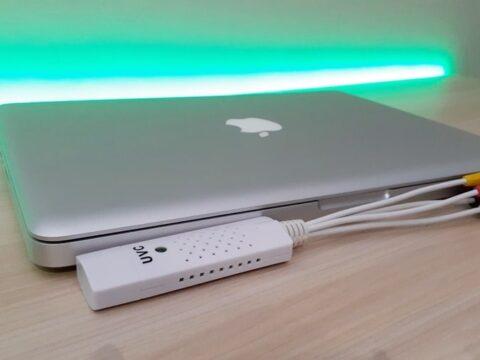
For this to work we need a 9 pin to 6 pin FireWire cable. And if anyone is asking out there, can a 9 pin port FireWire power a 6 pin FireWire? Turns out it can.

The 6 pin adapter will connect to the ADVC-55.

The 9 pin FireWire connects to the laptop in the same manner as earlier.

The ADVC-55 indicates it’s receiving power. Import sequence is the same as I mentioned earlier.

If you are transferring a three hour tape that definitely will be one massive file so you might want to edit that into smaller one hour chunks.
LifeFlix Render Results & Properties
Interestingly the results do show a varied result in the data properties.

Starting with the MiniDV camcorder we have 786X576 at 24.99 FPS. The bitrate is at 4019 kbps which is good, I don’t have any complaints there. I would take a guess the 786 width size is a slight black border added to the edges. The image itself is still at 720 pixels in size.

This is where I was thrown off a bit (although I’m sure there’s a good reason behind it). The Video 8 tape says that it’s at 1920×1080, keeping in mind part of that width will be black boarders. Thankfully it doesn’t skew the image like some of the ezcaps do (leaving you to solve the issue yourself).
It also captured the footage at 25FPS and at 9715kbps, which I have to say is impressive.

Lastly the VHS transfer is a little over 800mb for an 11 minute clip. Again similar to the Video 8 test, sized at 1920×1080 (and not skewed) and having a bitrate of 9688 kbps.

The above picture is what I’m referring to with the black borders. The actual video image is the 720×576 in the center.
Conclusion
After testing the three formats and importing them into a MacBook, I would definitely recommend LifeFlix as the go to program. The creator of LifeFlix also has a post how he managed to transfer VHS through a DV camcorder and into his Mac.
I hope this article gives you an idea that transferring your videos to a Mac is possible with a few tweaks, albeit slightly expensive tweaks.
1 thought on “How To Transfer Mini DV, Video 8 or VHS to Mac”
Comments are closed.