If you have old photos that you’re trying to scan and digitize, you might encounter that some have definitely seen better days. Depending how you store your photos, some photos will simply fade over time. So in this article, I’d like to compare when it comes to enhancing old photos: scanner versus software. Which will work better?
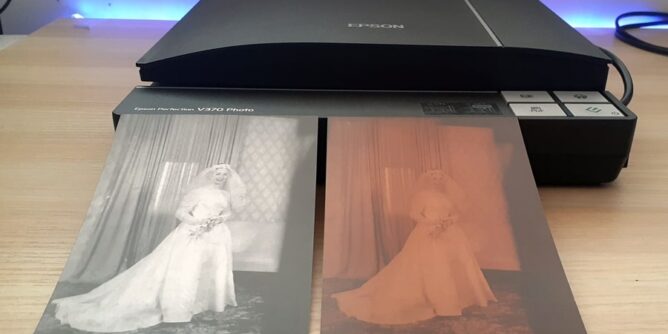
For this example I’m using the Epson V370 for the scans.
Any brand scanner should have supplied software that helps enhance the image. Also I would advise to be in some variation of a professional mode if your software allows for it. Most scanners these days do.
Scanning a Photo Without Any Correction
This will probably sound daft but I want to point out a simple tip when scanning photos in general, so forgive me if this is blatantly obvious for you.

Don’t place a single photo directly in the middle of the glass when you’re scanning. Unless you can seemingly place it down in the middle perfectly parallel with the scanner edges, which I highly doubt, then when it comes to previewing the image it will be crooked.

Place the photo face down along one corner to be sure it aligns with the glass and scanner edge.
I’ve seen people scan their photos in the center of the glass hoping to make a white border around the image. If you happen to be printing these copied photos later at a store or online, you will have the opportunity to add white borders with your order.

All scanners will let you preview the image before commencing with the actual scan.
The preview will show where the image is placed against the back drop.
Now If I was to simply click scan – the Epson V370 will scan everything you can see in the preview window, including the white back drop. If you were to do that, you’re going to find you’ll have to crop the image at some point later on.
Simply use the left mouse button and trace around the photo.

You can select the appropriate size in the Target Size tab and a rectangle will appear that you can guide over your image.

After you have selected the target size (6×4 in this case) and whatever dpi you prefer (300 dpi for this example) you can click the Scan button.

The end result will be a scan that matches your original image. If there are flaws on the original, doing a simple scan like this will include those same flaws. Keep in mind Epson’s scanning software has an extremely versatile color and levels adjustment that you use to enhance an old photo.
Using The Color Restoration Option
As mentioned earlier it is recommended that you try to use the professional mode of your scanner software if it allows. If you simply use an auto mode don’t expect higher quality results.

Using the same sepia preview as above, if we select the Color Restoration the Epson scanner will show what it thinks the image should look like.

This is certainly better than the previous sepia image we saw moments earlier.

Instead of leaving this image now in shades of different colors, I’d be inclined to turn it into a black and white image. The scanner has overcompensated for the original color thus making it appear green along the outer edge.

Selecting the Image Adjustment and drop the Saturation to -100 (in the case of Espon scan software) we get a black and white image.

You can choose to adjust the Contrast and Brightness if desired to fine tune the levels.

The example definitely looks better than the original sepia scan, but what can be done about the dust?
Is the Epson Scanner Dust Removal Any Good?
Epson has a built in dust removal tool which allows you to select from Low to High deciding how much of the scratches and dust it will try to remove. By no means is it perfect.

I’m not sure if all Canon brand scanners allow for dust and scratch removal, but this article from Canon USA explains where to find it using their software.

In the Epson Scan software Dust Removal is the last option under Adjustments. For the test I selected High to see what results it can achieve.

Also because I grew up watching Cheech and Chong movies.

While the results have removed some of the dust, there’s still visual specs along the bride’s face and the drapes in the background.
Because the scan is in black and white, I would be inclined to think that the software finds it hard to distinguish between what is dust and the actual image. If this was in color, it may have a better chance of removing more dust, but currently it has only removed a small amount.
You can find a sample of three images side by side in the conclusion section of this article.
Digital Dust Removal Using Free Photoshop
You could leave the scan as is or you could use a free online Photoshop alternative called Photopea which can help remove the remaining dust from the example.

Photopea works in any browser and as long as you have a decent internet you won’t have any problems. It is free and if you were going to use this tool a lot, there is the option for a 3 month no ads version.

In order to upload a photo, simply click FILE / OPEN then find where the scanner has saved the image.

Because this article is only about dust removal, I won’t be explaining the ins and outs of Photopea although I am sure there are numerous videos on YouTube that will show what each tool does. Also the tools are based off Adobe’s Photoshop, so Photoshop tutorial videos would still apply just using Photopea.

In order to remove dust and scratches, the only tool you will need is the Spot Healing Brush. If your image did have tears, you could use the Clone tool as well.

Now for the news nobody wants to hear. This will take some time depending on how bad the original image is. If you’re after perfection you will need to zoom into the image and search for minute specs.
The process is a matter of clicking over any specs of dust and the tool will remove those objects.

You can change the brush size in the upper left corner. By changing the radius of the brush this will allow you to heal larger specs of dust. It helps to adjust the size of the brush as you move about the image.

Once you have completed removing and spots or dust, first up congrats – how’s your eyes after staring at the screen for so long? Secondly make sure to save the image.
Simply click FILE / EXPORT then choose which file format you want.

From the above example, we can see Photopea has definitely removed any remainder dust on the bride. Regarding the black outer edges, if this was for a client I would crop those out. The subject matter is the bride, not the dark shadow.
Enhancing Old Photos: Scanner versus Software Conclusion
Is there any conclusive answer to whether enhancing old photos that one is better than the other? Maybe for a color image the scanner would recognize more white dots to remove but for a black and white image, I think it gets confused as to what is supposed to be in the image and what is not.

From left to right: No dust removal, dust removal set to high, dust removal set to high and spot tool used.
If your scanner doesn’t have any dust removal, you can always open each image into Photoshop or freeby version Photopea, and still be able to remove dust. Just be patient as it does take a while.
If you have a scanner does have a dust removal tool and you find it still has not worked to your liking, just know that you can further enhance the quality with a free online tool.