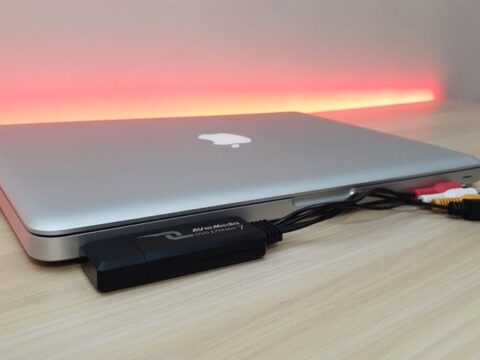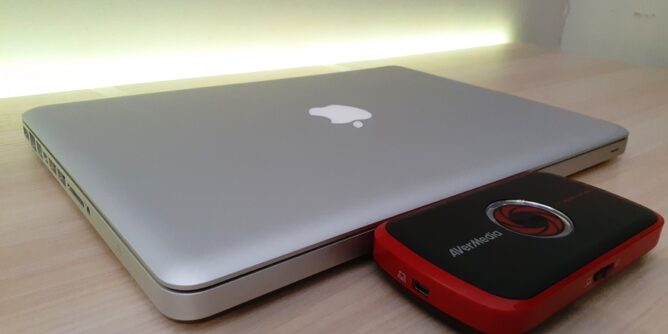
One of the first capture devices that I reviewed was the AVerMedia C875 for PC. As it turns out this same device had a driver for the Mac allowing you to capture from VHS and transfer to Mac. So I thought it would be interesting to test how the AVerMedia Live Gamer Portable transfers a video for Mac.

Two important things to keep in mind: the C875 Live Gamer Portable is no longer made and has been replaced with the Live Gamer Portable 2.
Also this Mac laptop is running the Sierra OS so if you’re running a newer OS, this driver will simply not install.
I’m still yet to get hold of the Live Gamer Portable 2 Plus (yes that’s the official name) but after looking at the driver downloads descriptions for the setup for Mac, I have to say it sounds like a nightmare.
Using this driver software for the original C875 device is actually pretty good. I do prefer the PC layout of the software, but it’s exactly the same as far as video quality goes.
I’ll never understand why it’s so hard to transfer VHS videos to Mac computer? It is one of the reasons why I bought an older model laptop that has traditional (unused) ports and there’s still a chance for it to work with older 32bit software specifically catered for video transfers.
Downloading RECentral Software
If you haven’t upgraded higher than High Sierra on your Mac computer then it can support this driver. You can downgrade to an earlier OS, but you do lose everything on your laptop – just be warned.

You will need to visit AVerMedia C875 product page to download the driver.

The driver is dated from 2017 and is only compatible with OS up to 10.12. Click on download for the driver.

Once the file has downloaded, simply drag it into the applications folder for the software to install.

The RECentral application will now appear in launch pad, ready to use.
The install process is relatively quick from download to running. The application is not very large at all. When compared to the several steps the same software makes you go through on a PC, it is a breath of fresh air to just move an application into a folder and have it be ready to run.
RECentral Walkthrough
The main software visually is just a small block allowing you to spin a wheel, giving you access to hidden settings.

There are four options along the outset of the wheel. By simply clicking on any of the icons, the wheel will spin that icon to the top. Click on the center command to open the settings for that icon.
Along the top there is a choice to change the Device, Video-In (from HDMI or Component) and the Audio (HDMI or Left/Right Analogue).

View – will open a folder where the captured videos will be. (Personally, I changed the settings so the files would be on the desktop).

Snap – Allows you to take pictures while recording. You can simply take snapshots after the video is captured via VLC player as well.

The main setting of importance is the cog icon. This gives access to Preferences such as video quality, sound and file save locations. There seems to be a Diagnostic Tool, but it never did anything while my device was connected.

Under the Normal Setting – you can change the language preference and also change the save location.

The Capture Setting allows you to change the Input Signal as well as the Video Settings. There is an option for loop recording which I would presume is for streaming? The option is there either way!

Specifically the input signal can be changed here to choose from HDMI or a component signal.

Thankfully, the Video Settings offer a large variable of options that can be saved for a new profile.

Video Format – allows you to record the video in an MP4 format or a TS file.

Resolution – This changes the video size. For the Mac laptop the maximum resolution size was 1280×720. For the actual test recordings I set it at 720×576.

Video Bitrate – Amazingly the software allows you to capture at a maximum of 60 Mbps (mega bits per second). It would be interesting to see what the actual quality difference is at 60 Mbps vs the 12 Mbps that I usually prefer to use.
Comparing the two different capture sizes on a standard VHS home video would (in my opinion) not show an improvement on picture quality, only just a larger file to work with.

Frame Rate – Allows you to set the proper frame rate you want to capture the video.

Microphone – Gives you the option for adding a speaking audio track.

PC Free – Allows you to change the settings on the C875 for the recording without connecting to a computer at the same time. Personally I wouldn’t use this due to not being able to see if the VHS transfer is capturing properly.

Diagnostic Tool – only seems to work for later model capture devices.
RECentral Connections
While I have praise for the Live Gamer Portable, it does have one very annoyance when it comes to connecting with the Mac.

My first test was to use the HDMI cable from the VCR straight into the Live Gamer Portable.

The picture appears quite clear with no stuttering or any visible issues, except – the device thinks the tape is copy protected!
This appeared with any video tape I placed into the VCR and tried to capture using HDMI. I’m confident in saying I think the device is over reacting!

The thing is – there is no where in the software to turn off HDCP. Unlike the PC version which has a little radio button to turn HDCP on or off, the Mac version has no switch. Click on the big REC and nothing happens.
Very annoying!

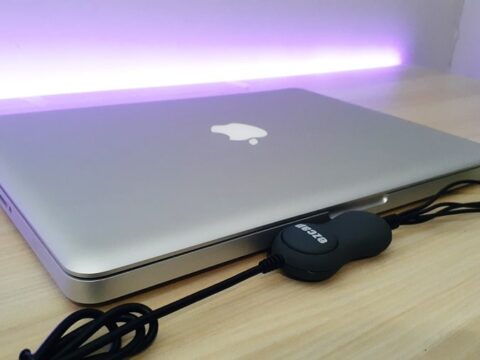
That brings me to test number 2, using an adaptor CM401- composite to HDMI connection.
Keeping with the HDMI settings on the RECentral software, this time I was able to record the tape.

The software will indicate the time duration as it captures the footage. Volume is loud as you record. In the very top right corner, there is an option to turn the video monitor on or off.
AVerMedia Mac Results
The YouTube sample probably doesn’t do the video justice but the quality is definitely clearer than other cheaper models. I’ll have to do another test between the PC version and the Mac version, to see if there is any picture quality difference.

Looking at the video properties, we can see the file size is already 877MB with recording at12000kbps for a ten minute clip. Doing some quick math a one hour video will take approximately 5GB.
I can only wonder what a 60Mbps file would become for an hour video!!
Conclusion
I like the AVerMedia Live Gamer Portable for recording old VHS tapes. When it comes to Macs though, it’s a shame you have to run the software on old Mac OS systems. It’s also a shame that the Live Gamer Portable is not made anymore.
The replacement (Live Gamer Portable 2 Plus), runs from Mac OS 10.14 upwards. The same trick with the CM401 adapter (composite to HDMI) should work as well, but as far as I can tell , it runs a different RECentral software.
If you can meet the criteria of owning an old Mac laptop running Sierra or High Sierra and finding a C875 second hand cheap and are willing to purchase a CM401 adapter, then yes, this device will give you great results from your old VHS tapes.