So how do you digitize cassette tapes? Is it really that complicated?
Transferring cassettes into a digital format is an easy process if you’re willing to put in the time to do it right.
This post I’m going to show you the exact steps I use when I have to transfer an audio cassette into an MP3 or burnt to a CD.

Last update on 2024-10-22 / Affiliate links / Images from Amazon Product Advertising API
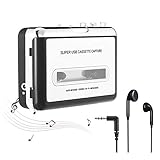
These USB cassette players can be bought from any number of places from Amazon to banggood (affiliate link) and they will all do the same thing.
Allow the audio to be transferred onto your computer.
There is a more expensive version called the ezcap231 that you can find on Ebay. That version will seperate the songs into mp3 files and doesn’t need to be connected to a PC.
Sounds awfully like the instant video converter device that “doesn’t need a PC either”.
The Super USB Cassette Capture device I bought came with USB cable, cheap headphones, user manual and a software CD, which I might add is just Audacity.
And that’s free!
A look around the Super USB Cassette Capture

Along the left side there is an option for a charger which isn’t supplied and to be honest you would never need one for a device like this.

Having no charger is no big deal as the interior has a compartment for two AA batteries.

Two AA batteries will last at least five 90 minutes cassettes.

Along the right side there is AUDIO connection, MINI USB port and the volume control.
Audio connection is for the headphones supplied to monitor the sound but if you have the cassette plugged in via USB, you can monitor the sound via your computer.
You can plug in an audio cable into the Super USB Cassette Capture then using the other end of the cable and plug that into the LINE IN on the back of you computer’s sound card.
Then again that option is useless if you only have a laptop.

Along the top there is the PLAY button, STOP, FAST FORWARD, REWIND and options to change the direction (which side it is playing at the time) or if you want the tape player to continue and play both sides without stopping.

Once open, drop a cassette into the device and have the SIDE A facing you.
Close the tape and hit rewind, this way you are definitely playing from SIDE A first.

Mini USB cable is plugged into the side.

From here find a free USB port on your computer and connect the cassette player.

The computer will install the drivers from the Super USB Cassette which may take a minute.
How to install Audacity on a PC
Interestingly this device comes with a CD to install Audacity on.
Problem is, it’s an old version of Audacity and on top of that, what if you’re converting music tapes to a laptop that doesn’t have a CD player?
Or maybe you have a windows tablet that you want to record the music onto.
Either way you’re better off just downloading Audacity from their website.

Previous versions of Audacity had you downloading the LAME encoder separately but that’s not the case anymore.

Once you have downloaded the file to your designated folder (whether it be the downloads folder or even on the desktop) click RUN to proceed the install.
The latest version as of this post is 2.3.2.

The default home screen does appear simplistic.

With the Super USB Cassette connected to your computer, make sure in the top right corner Audacity is selected to MME and the USB PnP Audio option.
This means Audacity will record strictly from the tape cassette an nothing else.
If you look to the right in the above picture, you will see six tools.
The tools that are important are the selection tool (which looks like an I) and the time shift tool (looks like two arrows).
When you’re ready click on the RED button and and click PLAY on the cassette player.
Editing and Exporting in Audacity

You will have to let the tape play all the way through in real time so be patient.
As the music plays Audacity will show the waveform.

Once the cassette has fully finished you will be left with one large audio file.
Before you do anything, make sure to export the file as a back up, in case something goes wrong or the file corrupts.
Better to be safe than sorry.


Click on File – Export – then choose the audio format you prefer. In the example above I went with WAV.

The next step is a little slow and tedious but this will help if you are after each track to be separate and not one large file.

Using the selection tool – highlight where the gaps are between songs then press ctrl + alt + X. That will make a gap between tracks.
To zoom into a certain section – hold ctrl + 1. You can keep tapping to zoom further.
If you want to zoom out – hold ctrl +3.

The example above shows all the gaps made between tracks. The larger gap is the time it took the cassette player to finish side A and begin playing side B.
To make each individual track you will have to skim through and find where the songs fade out at the end then make a gap.

Once again save the project in case any issues arise.

Next use the selection tool to highlight a track then hold down ctrl + T.

This will eliminate all the other tracks and only leave your highlighted track.
Next click on the Time Shift Tool (looks like two arrows) and move the track to the left where the time starts at zero.

Now you can export that track as MP3 or WAV.

You will have to name each one as you export each individual track.
Once you have saved the first track hold, tap on ctrl + Z twice and all the tracks will reappear.

This is the reason to save the project before exporting individual tracks, in case you make a mistake.

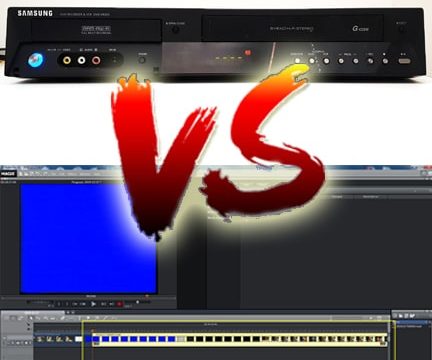
Audacity also accepts a VHS capture device using the RCA plugs. This allows you to copy the sound from a VHS tape.

This could come in handy if you had music that was recorded on VHS long ago and was never released onto CD or tape.

The recording does come in pretty loud from the capture card and as there is no volume control you will need to adjust the end result through Audacity.

That can be fixed by highlighting the track then select – Effect – Noise Reduction.
Burning an Audio CD Using CDBurnerXP
What if you want to transfer those MP3s or WAV files onto a CD for listening in your car?

CDBurnerXP is the simplest and free CD software. You can burn discs through Windows PC using Media Player but again that works on some versions of windows and not others.
At least by using CDBunerXP you have a burning software that is designed to just work.

Clicking on the link will lead to their homepage where you can download the software.
Once you have done that proceed to run the install.

Take your time with clicking on each agreement.

Okay, so sometimes with free versions of software they will try and suggest an add-on that you don’t need.


As I said make sure you take the time to read what they are asking and not just click anywhere.
I understand these companies need to make money as well. All the simple reliable tools do it these days.

You will have the choice of which components to install. I find just the default installation is fine.

Finally CDBurnerXP will ask if you want to create a desktop icon.

Upon completion you can now launch the CD software.
CDBurnerXP Creating an Audio Disc
This software does allow for burning other types of discs but for this post I’m going to focus on the CD burning.

Click on Audio disc then OK. This type of disc will play as a music CD or in car CD players so you will be limited as to how many songs you can add.
80 minutes is the default. There are 90 minute CDs, but not a lot of stores seem to sell them.
If you wanted to make an MP3 music CD then you would choose Data disc and that will allow you to add a substantial amount of songs.

A new window will open showing two sides.
The left hand side allows you to find the folder where you are keeping MP3 or WAV files on you computer.
The right hand side shows what is inside that chosen folder.
A little player box allows you to hear each song, just so you know what you are about to burn. A nice touch I think.

Hold down ctrl – A to select all the music and drag it to the section below.

Along the bottom CDBurnerXP will show how long the CD is in minutes.
As long as it is green, you are fine.
When you’re ready click Burn.

You will be greeted with some burning options for burn speed and if you want a pause or no pause between tracks.
Again, a nice touch, considering some paid burning software don’t even offer that.

I personally like to lower the burn speed as not every device that reads discs can read the at high speeds. Lower is safer.
When you’re ready click Burn disc.

At this point you will just have to wait.

For this example, the CD had taken a little over 4 minutes.
Conclusion
If you are willing to spend a little on a Super USB Cassette Capture device, you could transfer all those audio tapes and at least update them into MP3 files.
Last update on 2024-10-22 / Affiliate links / Images from Amazon Product Advertising API
The same can be said if you had recorded videos and you just wanted the audio.
Now you know how to.