So can you clean A VCR yourself? With VCRs and VCR/DVD recorders no longer made, you should be trying to quickly convert those VHS tapes as soon as possible.
The advantage being, once they are in a digital format, you’ll be able to copy them and back them up using various other methods.
But what if you put a VHS cassette into the VCR, hit play and only see the video play back is jumpy and scratchy? It may be time to clean the inside of your VCR. Don’t panic – it’s not hard. But you will need a few items before you start.

The above example is film cleaner which contains Isopropyl alcohol. This will be used to clean the rollers. You can purchase Isopropyl alcohol at Amazon or on eBay, even from any hardware store.
Don’t think that you can simply use nail polish remover as a substitute, as this post on reddit explains the difference between the two.
I would just try and fine the Isopropyl.

The VCR drum head will need to be cleaned with a wipe.
Some people have suggested using a moist cloth or paper dipped in the Isopropyl alcohol, but I’ve found using simple lens cleaning wipes work for me.
As an option you can also add Q tips to the list. I use them as you’ll see later on. You could use the wipes to clean all the rollers, that’s up to you.

Second you will need a trusty Phillips head screwdriver.
Cleaning the VCR
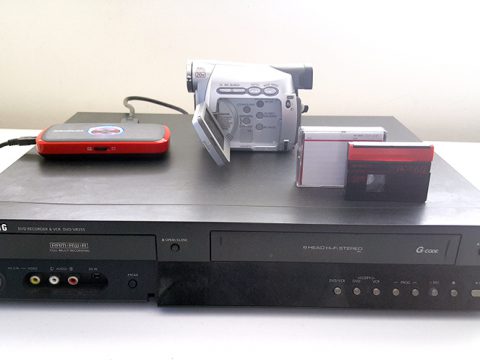
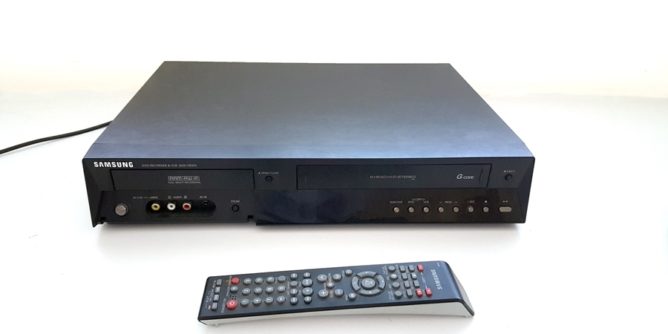
The DVD combo model I am cleaning is a Samsung DVD VR-355.

Make sure the VCR is unplugged from the wall socket.
Be sure to check for screws all around the VCR. Usually there is one on either side and two along the back.
This will differ depending on the brand VCR you have. Generally there are always four screws keeping the lid tight.

Take the cover off and examine the following areas that will need cleaning.

There are three main areas that can be wiped as the VCR tape will run across these and possible attract dirt to them. From left to right they are:
- The erase head.
- The drum head which transmits the video signal.
- The audio head for the sound signal.

The first two circled ares are the pinch rollers that pull the tape across the erase head, drum head and the audio head. They need to be wiped as well.
The last area on the right I clean as well because they get dirty too.

Use the Q tip dipped in the alcohol solution to clean along the erase head. Don’t drench it, just use enough to wipe it thoroughly.

Using the lens cleaning wipe, hold it gently and spin the drum head counter clockwise to wipe the dirt away.
Be careful, as there are small cutout holes that read the tape. You do not want to have any lint or Q tip strands getting caught inside there.
To the right of the drum head is the audio head. That too can collect dust.

Using a different VCR/DVD combo a Panansonic NV-VP31, we can see that it has an added drum head cleaner.

Not all VCRs have this. This is a little spongy material that you can twist if it is dirty.


The pinch rollers and metal guides can be wiped over using the alcohol solution and Q tips.


Both sides. Basically any part that will come into contact with the VCR tape.

This rubber roller seems to attract a lot of dirt as well.
Make sure not to use too much solution. You don’t want it to melt at the rubber gear.

As you can see the Q tips show the rollers and gears can get extremely dirty.

So now the VCR is cleaned it’s time to replace the cover and turn it back on.
If by chance you are still seeing a deteriorated picture or sound you may need to do the procedure again.
After I have cleaned a machine I generally place the cassette inside and fast forward til the end of the tape and let it rewind. After that procedure I hit play and the video playback appears fine.