When a company releases a free version of their popular software and still sells their paid version, it makes you eventually wonder – what am I missing out on?
Turns out, quite a lot.
Considering the price is not expensive (probably due to people using discs less and less). People who will get the most out of this software are those who want to back up music collections or even create DVD’s from their phone videos.
I did a post about the free version of Ashampoo Burning Studio and it does cover the essentials of burning discs and creating audio CD’s it is still limited with what it can do.
Installing Burning Studio 21
As of writing this, the latest version of Burning Studio can be found here. Also by the looks of things they do have another version called Burning Studio 2020, although I couldn’t tell what is the main difference.
There is a trial period, limited to initially 10 days but can be extended.
Installing Burning Studio is a breeze.

Once you have downloaded the file, double click the setup to proceed with the installation.

The install will take a few minutes to complete.

After install, you will see (sometimes) pesky reminders of sales that Ashampoo is having for other products. This can be simply clicked away and will not reappear during your usage.
I wonder if you were to buy every product at the same time, would the do you want fries with that reminder finally leave you alone?
I doubt it. But this is the software generation we live in and I can’t blame them.
Burning Data Disc
Straight off the bat, the layout is sleek and extremely easy to use. There is no way to get confused in the option selections.

Testing out the Burn Data, you will find that you can just drag and drop files of any kind. Under this method you are simply copying files that will be read by other computers.
It’s also limited by the size of the disc that is used to burn.

You can click on the add + symbol or drag files from an open folder.

Along the bottom, you will see how large the file is. If there were more files added the blue line will continue to move along.
This example is one video file that is 3.3GB.
Clicking Next will take you to the next stage.

At this point Burning Studio will wait for a disc to be inserted.

The large tick signifies that the data will fit on the blank disc. If I had placed in a blank CD which only holds 700MB, a large X would have appeared.
The final stage would be to click on write DVD.
You can change the write speed and some of the write settings. The default settings that are already selected are fine.
Burn Data – More Options Available
Some of the other add on features that Burning Studio 21 offers can certainly come in handy.

New Disc + disc spanning – This allows you to create a backup of a large file or folder. For example, if you had a folder that was 20GB filled with photos and videos, you could burn that folder onto 5 discs by simply letting Burning Studio choose where to break up each disc.

New Disc + Autostart – Creates an auto start disc that will open a file or menu. Some older photo programs still use this type of thing but whether you would use it, who knows?

New Encrypted Disc – allows you to password protect a CD.

Create Scratch Protected Discs – Allows you to make scratch protected discs. I personally didn’t test this.

Restore Scratch Protected Discs – This is in theory supposed to bring back corrupted data from a scratched disc. Again I din’t test this at the time of this post.

Update Disc – This will allow you to update a burnt disc. But I would assume this means an unfinalized disc or only a disc burnt using the Ashampoo software.
Audio & Music
Audio burning options is where Ashampoo really standout. The options they have, catering for all sorts of outputs makes it miles ahead of other brands.

Some key features is the Rip Audio from CDs into MP3 format. Yes there are free versions out there but it’s nice to have it all in one packaged software.

Creating an Audio CD is an easy task. Simply click on the type of audio disc you want to create. This example I’m making a CD from MP3 music.

A new window will allow you to choose to either add + (from the upper right corner) or drag music files directly into the list.

The blue bar along the bottom will show length of time available. Most CDs are at 80 minutes duration.

By placing in a blank CD, Burning Studio will make sure the correct type of disc is inserted. If you were to place in a blank DVD-R disc, the software simply won’t let you create a music disc.
From there clicking on write CD will commence the burning.

The tie t takes to finish burning will depend on you computer specs and how large the music compilation is.
Generally you could be looking at 20 minutes for a complete CD burn.
Video & Slideshow
There are still the options to create a VCD, Blue-ray discs and DVDs.
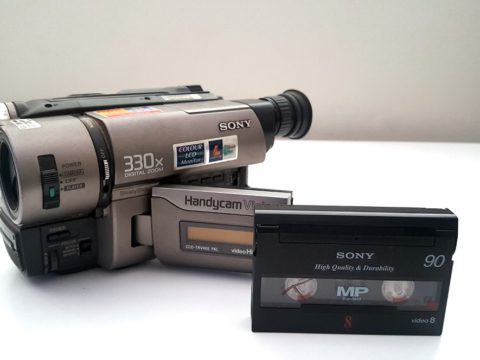
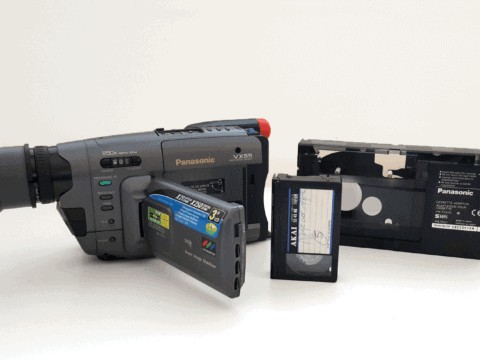
Because Blue-ray players will play a DVD I personally don’t see a need to burn an old VHS tape to Blue-ray. It’s either DVD or digital.

For this example I’ll just click on Create Movie/Slideshow DVD.

Next option is to create a title for the disc.

This will not be able to be changed afterwards as computers and DVD players are going to show this name before the DVD begins to run.

Next option is the region of the DVD and if you want it wide screen.

Ashampoo will then show the list window.
Same as before, you can drag the video files from another folder across into the list or click on the add + and search for the video folder on your computer.
Along the bottom, you can see that there are three green excellent tabs.
Each one represents a 4GB DVD, an 8.5GB dual layer disc and a 650MB mini disc.
Depending on the file you open and bring into the list window, these excellent tabs will turn red indicating it is not ideal for that type of disc.

In the above example I searched the desktop and found my test MPEG video and click OK to add.

The file is added into the list.
Instantly the 650MB mini disc option is no longer available to select as the file is too large for it.

The paid versions of Burning Studio will allow you to drag MP4 videos into the list to create a DVD.
I have to say this does make life easier compared to the free version, especially if you are trying to simply copy over videos taken by your phone.
This added option makes the price worth paying in my opinion.
DVD Authoring Layouts
The next options are really just cosmetic with Burning Studio supplying a variety of different layouts.

To be honest this number of layouts would probably never get used but it’s nice to know there are over two dozen to choose from.

Clicking onto each layout will give an idea of what the pages will look like.

The videos will play in the background as you go through the menu.

Double clicking on an element will allow you to edit the features.

Along the left hand side is the edit menu. From here you can alter the background image, alter the preview window shapes.
You can add more buttons and change the type of buttons to place on the screen.

Editing text can be done by selecting the New Text option.
You can also alter the current text that is on display by simply selecting it.

A new window will open allowing you to add the new text (or title).

Font style and sizes can be changed.

Once you have decided on the finished text and image layout, simply select the next button.
DVD Authoring Burning a Disc
While altering the DVD menu may appear daunting, you could simply click next over and over to skip past it ( I personally wouldn’t).

At this point Burning Studio is going to check if there is a blank disc in the computer.

With a correct disc in place, you will have the options to alter the write speed and if verify the burning at the end. Personally I don’t do this as it appears to be a waste of time and slows the whole process down.
Finally click next.

Ashampoo Burning Studio will encode the video. This process is not the actual burning. This is just placing it into a _TS file for the DVD burn.

Depending on your length of video this will take some time. The above example took approximately 30 minutes.

When the program has finished encoding, the burning process will then proceed.

Fortunately the burning is relatively quick.
Covers & Inlays
An interesting feature that Burning Studio has is the option to create CD covers and CD images.
Now obviously you will need a printer for the general covers printing and one that can do CD printing. But if you already do own a printer that can do both of these things then you’re going to find this option quite useful.

For this test I didn’t have a printer set up to do a cover printout. Personally my clients don’t require or ask for the DVD’s to be printed out.

If we click into the Covers and Inlays menu option a new window will open revealing all the varieties of cases and booklets that can be created.
Simply selecting the case type then click on the add + image icon along the right hand side.
Simply find the folder where the image is kept then click OK.
From there you will have to align the image over the CD or DVD cover outline. Keep in mind, the image you select may not fit properly and will crop.

When it comes to printing the layout, Ashampoo has a huge list of printers that it’s compatible with.
Whether you would go all out for a final DVD product cover is up to you.
The Remaining Options
Burning Studio 21 does have more options in relation to digital backups onto CD/DVD’s.

Copy Disc – Ashampoo is so reliable when it comes to doing a one for one copy of a disc. I know when a client asks to get another copy of a DVD, I can quickly use this software to make that copy.

There is an option to create a Disc Image, although this isn’t to be confused with making a ghost image of an entire hard drive.

Backups – will let you copy large chunks of data onto discs.
I tried the backup feature for the phone to see what it would allow to copy. The amount of times I’m hearing from people who don’t know how to backup their phones amazes me.
I’m even telling my daughter to copy her photos onto a hard drive only to hear the ususal yeah yeah reply.
And now what do I hear, ever since I updated the iPhone the battery keeps dying!
Back up the photos and videos.

The two options are to Create a new backup or Update an existing backup.

There’s a choice to back up the contents of Images, Music, Videos and Documents individually as selected or as the whole backup.
It doesn’t do phone numbers, text messages or actual phone related data.

Next it will scan the contents of the phone and decide what it can and cannot do a backup from.

Once finished Burning Studio will tell you how many discs it will take to do the backup.
In my case above the software told me it would take 3 DVD’s to complete the backup. Needless to say this is what happens when the limited storage capacity of a DVD is at 4.7GB.
It’s a good feature to have but a little flawed as phones begin to come in 32GB and higher storage capacities.

There is an Advanced Functions setting that is ideally suited to using a re-writable disc.
But then you could just use a USB and be done with it.
Burning Studio 21 Conclusion
If you were wondering if Ashampoo free has any advantages over the paid version, then I’m going to disappoint you an say no.
Burning Studio 21 is a far superior product than its free counterpart and you are better off even downloading the free trial version just to get a feel for what it can offer you.
Its music burning options are better than most programs out there and the DVD burning from MP4 files makes it easier to hand out copies of your phone videos and photos to those grandparents who don’t own a computer but do own a DVD player.
As far as pricing goes, you could always sign up to their email list and then buy it when Ashampoo have a sale.
That’s what I did.