When it comes to video editing (at least in my case), I’m always on the look out for something that is easy to use and is an all in one package.
Learning about Cyberlink’s PowerDirector I was pleasantly surprised that this software does cover my needs of editing and DVD authoring and also came with a few bonuses.
- Impressive motion graphics & animated titles - combine motion graphic elements with your videos’ titles to make them...
- Creative transition effects - 18 cool new transition effects that will instantly turn your videos from ordinary to...
Last update on 2024-10-22 / Affiliate links / Images from Amazon Product Advertising API
Just so you are aware, this review will be be a long read and it’s designed to be a complete what it has to offer from my perspective.
A simpler alternative to this software would be ACDSee Video Studio 4 which you can read my review of.
That being said you can download the free timed version of PowerDirector .
So now onto the review.

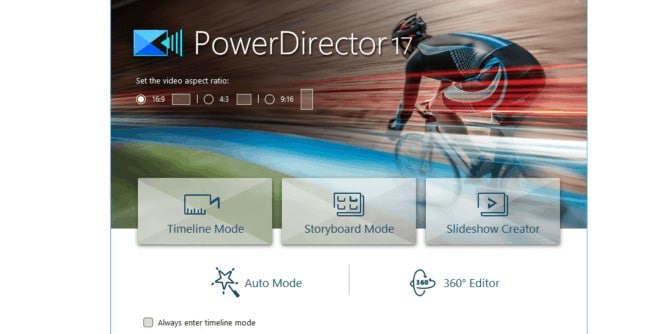
If we click into the first option called Timeline Mode we can see the PowerDirector 17 edit layout.
Slightly similar to Corel’s VideoStudio Pro layout but with a few more hidden menus.
You can read my review of that VideoStudio Pro editor to compare if you like (maybe after you read this review first).
PowerDirector has four modules along the top called Capture, Edit, Produce and Create Disc.

Before venturing into the editor itself, there is a SET USER PREFERENCES wheel/cog along the very top of the program.
Clicking on this will open a new window allowing you to change a multitude of preferences.
You can click into this preference area at anytime to change any settings (although if you are in the middle of a project it could affect the outcome).

PowerDirector 17 gives you five different editing options from the get go. They are:
TIMELINE MODE – where videos and audio are on separate tracks layers.
STORYBOARD MODE – where each scene is individually placed in boxed positions.
SLIDESHOW CREATOR – allows you to create dynamic slideshows.
AUTO MODE – let PowerDirector 17 make the video for you .
360 DEGREE EDITOR – edit 360 footage.
You will also notice you can instantly choose the aspect ratio before starting a project. If you are transferring old videos 4:3 aspect ratio will be the choice.
Capture Module – What Can it Do?

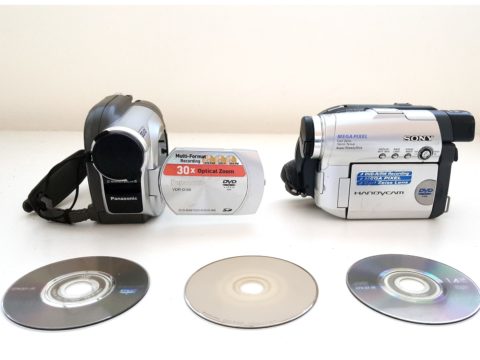
Opening the capture module you will see along the top left a variety of inputs that the software can capture video from.
They range from the webcam, microphone, CD, DVD, video cameras, TV signal and digital TV. I don’t know about you, but I think that’s impressive!

The Screen Recorder will let you decide of different methods and with a variable frame rate up to 120 FPS.

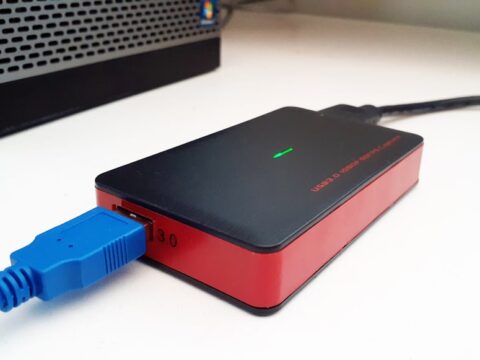
For an example I tested the capture method using a cheap EasyCAP capture device just to see what the results were.

PowerDirector 17 recognized the device instantly and allowed me to change any of the profile settings and advanced settings.
Interestingly the settings would jump from 480p straight to 2K then 4K. There was no 1080 or 720 option?

The cheap EasyCAP device also had an image size limitation of just 640×480 but it was recorded at 720×576.

There are three different codecs to choose from.

By clicking the RED RECORD button you are good to go to capture any footage.

The end result will be saved and added into your media library.
Overall PowerDirector does a great job of capturing footage and giving a few tweaking options.
Edit Module – The Media Room

For some reason, Cyberlink decided to break up each area and call them rooms. I don’t have a problem with this, I just haven’t heard of other editing programs calling it that.

Taking a look at the the above section (media room).

From top left there is the option to import media from any folder. You can also drag files into the library and they will be saved in there.

Next is the PowerDirector plugins. There are:
MultiCam Designer – More ideal if you have or are recording from several video sources at once.
Theme Designer – PowerDirector 17 has built in themes that you can add your videos to in order to give a professional look. You can add mor than one theme to a project as well.
Action Camera Center – Allows you to edit and fix footage of an action nature.
Express Projects – Pre made templates that you can drop you video clips over. Interesting idea I haven’t seen done elsewhere.
Screen Recorder – Same as the Capture Module screen recorder.
Blending Effect – Allows you to place an image over a video. Not to be confused with chroma keying, but just an added effect.
SlideShow Creator – Same as the Slideshow creator option at the start of the program.
Paint Designer – A simple yet cool looking animator using the mouse as a brush tool.
Video Collage Creator – Another cool idea to have several videos playing at the same time.
Magic Movie Wizard – A simplified version using a step by step process to making a video.
AI Style Plugin – Changes your videos to painting like effect.

Next option across will let you sort the media into various categories.
Media Content – is where any videos, music or images that you add will be stored.
Color Boards – plain color boards for chroma key samples.
Background images – where you can store images that you may use as for samples in your video.
Background Music – where you can store any music for the project.
Sound Clips – sound effects for videos.
My Projects – where your videos will be stored for quick access.
Express Projects – You can use the sample templates for quick edits.

The next three settings are just if you want to view videos only, photo only or music only in the library. Each of these can be toggled on or off at any time.

PowerDirector 17 will allow you to arrange as icons or sort the projects in any manner you wish.

Icons can be enlarged or shrunk using a slider. This option will disappear if you choose to view projects as details.

Lastly you can also search through projects using their saved names.
Edit Module – The Many Rooms

Along the left side we have PowerDirector 17 has more rooms.
First on the list is FX which you can scroll through to see hundreds of effects that may be of use for your project.

Below that is the video overlay or PiP option.

Next we have the particle effects which can be added to projects. Ideal for intros with text.

Speaking of which, the next room is text.

When you drag a text sample to the timeline and double click it, a new window will open.

This window will allow you to edit the words and fine tune how you want it to look.

Next room below are the hundreds of fade options.

The next room is a simple to use (but effective) audio mixing desk.

The last three rooms consist of a voice over mixer – allowing you to add a speaking component, chapter selection and adding subtitles.
Would you use these last three rooms for home videos? Possible, but I think those three options would not be a high priority if you were converting old videos.
Edit Module – The Timeline
Whether you have one long video footage or small clips edited together, you will find there are more edit options once they are laid out on the timeline.

Simply dragging the footage to the timeline will not show it in its entirety.

Along the left hand side of the timeline there are two little buttons. One allows you to add more tracks (see below). Next to that will allow to see the project from start to finish thus showing how long the footage is.
Also in this area you have the options to disable tracks that are not necessary by simply ticking the boxes.

Adding tracks is organized in a manner to allow you to decide how many of each track a large project may require. Personally adding too many tracks can be unnecessary for simple home videos.

Right clicking on the project footage will show more options you can do to the track.

The Split tool allows you to cut into a clip to remove any wanted portion of the video. CRTL + T is the shortcut for this step.

Highlighting a clip then clicking on the SCISSORS ICON will open a new window to fine tune the edit.
Single trim will only edit for one segment.
Multi trim allows to edit several segments from the one clip.

To the right of the trim icon is the Designer tab. Clicking on this will open various Designer options.
PiP Designer – lots of key frame tools are at your disposal.
Mask Designer – Allowing picture overlays and moving them about the video.
View Designer – For editing 360 degree footage.
Action Camera Center – This will open the action options such as Video Stabilizer, Lens Correction, White Balance, an amazing preset of color balances, Time Shift Effect and Freeze Frame.
Content Aware Editing – Let PowerDirector 17 decide how to edit your video footage.

Fix/Enhance is the next tab that allows you to alter and correct qualities such as the white balance, video denoise, edge enhancement, color match etc.

Tools will give you options to change like video speed, reverse zoom and crop, motion tracker and more.

The next tab is Keyframe Settings which allow to add a keyframe to settings like the Fix/Enhance options as well as how a clip will look and sound.

The last two tabs are Trash and More Features.
Trash – for deleting the selected clip and More Features happens to be the same as right clicking on a selected clip at any time.
Edit Module – Playback

PowerDirector allows you to playback a Clip or the whole Movie. I like the idea of just clip playback, especially when you have to cut a small segment and watch it back over and over to get it right.
There’s nothing worse than having to move the scrubber back each time.
Under the preview window the buttons are:
PLAY – using the spacebar or clicking on the arrow will play the clip.
STOP – tapping the spacebar or clicking this icon will stop playback.
PREVIOUS MINUTE – allows you to skip back a minute at a time.
SEEK BY – left clicking on this icon will allow you to adjust how far the editor will search by whether it be frame, second, minute, scene or chapter.
NEXT MINUTE – skip forward by a minute.
FAST FORWARD – speed through the video at X2 speed.
SNAP SHOT – ideal if you want a certain picture as the loading screen for a DVD.
PREVIEW QUALITY – This allows you to set the preview screen.
VOLUME CONTROL – adjust the volume control.
3D – Click if you wish to change the preview into the variety of 3D options for playback. I personally haven’t had to transfer anything like this.
UNDOCK – allows you to un-dock the preview screen. Nice advantage if you have a really wide monitor or two monitor setup.

Lastly there is an option how the preview screen is displayed allowing you to zoom in by four hundred percent!
Produce Module

PowerDirector has all the main export options covered.
Along the top are the settings for exporting as a normal 2D movie, 3D, export for a device or upload to online.
File formats are available at the touch of a button with a Profile Analyzer that can decide the best export options.
They really do want to make things easy for the consumer that’s for sure!

Depending what export option you choose there will be a drop down window for the file extension. Most popular option is generally MP4.

To edit the MP4 settings there is an icon of a pencil. Clicking on this will open a new window allowing you to change resolution, bitrate and audio.

You will be able to rename the profile so that you can use those same settings every time you transfer a video.
I’ll skip past 3D export. Reliving home videos in 3D?
Isn’t that just called memories?

Next there are various device export settings.
Apart from exporting back to tape , all the other devices can read 1080p MP4 so you won’t have trouble with just exporting to MP4.

Lastly PowerDirector 17 lets you upload directly to popular online sharing platforms.
But again no export to Facebook? Maybe this has more to do with how Facebook plays with other software? I just think it seems like a missed opportunity.
Create Disc Module
Something I have noticed with software that creates DVDs is how long they can take to burn a disc. It can be painfully long at times.
I was in for a shock when I tried PowerDirector though. I was sure I had made a mistake when it only took a little over fifteen minutes to finish the project.
But I’ll explain that a little further down.

By default the Create Disc window will show your project along the left hand side and the menu preview along the right hand side.

Clicking onto the Menu Preferences allows you to edit by downloading pre made templates, having no menu at all or even importing a background image from your computer.

2D Disc tab gives you the choice of what media to burn your home video onto.
Settings below allow you to change the encoding format and the audio quality as well.
Audio can be added as well so the menu could have music play in the background.

Finally when you are happy with your DVD burning settings, there is the option to preview the menu or simply burn the disc.

You have the opportunity to rename the disc, how many copies to burn.

And this is where PowerDirector 17 does some real magic.
Other video editors that I use first render the project then burn it to disc. This process can take an hour or two hours sometimes

Like I said earlier, I thought I had done something wrong as I hadn’t seen burning done that fast.
Turns out PowerDirector has what they call a TrueVelocity engine that speeds through renders and burning.
What does that mean in simple terms? That you’re not wasting time waiting for a disc to burn! I can’t praise this enough seriously.
Storyboard Mode
Phew, can you believe all that review was for the Timeline Mode? I promise the next sections won’t be as long.

From the main menu there is an option for Storyboard Mode. This is kind of a simplified editing mode but still allows for for keyframes and color corrections to be added.

Once selected you will notice the time line is now just simple boxes.

Clicking on import will allow you to copy over videos, photos or music to add to the media library.
Simply dragging clips into the boxes will be the project’s timeline. In this mode you cannot add more tracks only just add music.

If you double click on an item (video or picture) a new window will open giving you further editing features. By default it will open the PiP Designer editing window.

Above the box timeline are the Designer, Fix/Enhance, Tools, Keyframe and More Features, which be selecting any of these will allow you to edit the current clip you have selected.

This method of editing is ideal if you want to import a video and do some minor editing then export as MP4 or as a DVD.
In this mode PowerDirector can get the project done extremely quickly.
SlideShow Creator

SlideShow Creator allows you to create clever movies from your photos. It beats the generic type of slideshow (one image cross fading after another) and gives you the chance to edit how it will play each photo.

It’s a very easy process to get started. Simply click on import photos or import folder.

A new window will open where you can point to the required folder. Simply select the images you want and click on open.
PowerDirector 17 will import the images in the order they were selected from the folder.
At this point you can rearrange the photos to be in any order.
Select next when ready.

The next tab will let you choose a slideshow style.
Below that is the option to add music from your computer.
In the lower right corner there is an option for the slideshow preferences which will allow you to change fit music to photos or fit photos to music.
I didn’t try both options. I just went for the fit music to photos. Personally I don’t think this is something you should worry yourself over.

Click next to preview the slideshow. The playback options are:
PLAY/PAUSE – tap the space bar to play or pause the slideshow.
STOP – to stop the preview.
PREVIOUS FRAME – go back one frame at a time.
NEXT FRAME – move forward one frame at a time.
FAST FORWARD – advance through the project.
SNAPSHOT – lets you take a snapshot from the slideshow. A very cool feature I might add.
VOLUME – control the sound of the music.
3D – whether to turn it into a 3D slideshow. Possibly interesting concept.
Lastly there is the timer showing you how long the project will play for.

To edit any slideshow click on customize.
Each preset has different editing functions for example, the image above lets you move the center square and change its size. But this editing only applies to this chosen preset.
Another preset will only let you add image quantity.

Each image can be edited and tested separately to see the results for that individual slide.
Cyberlink have definitely thought of everything with this addon.

When you’re happy with the slideshow you can export as a file or transfer to disc.

If you click on Produce Video PowerDirector will open the Produce Module where you can export in the same manner as earlier.

You can transfer the slideshow to a DVD which will open in the Create Disc Module.
The functions and choices are the same as mentioned earlier.
Conclusion – Is PowerDirector 17 For You?
What do you define as value?
For me, the DVD burning speed and the simple SlideShow Creator made this a must buy. Knowing I can guarantee a set time aside for burning speeds up my daily process for work.
Is it perfect? I’m not sure. It does a hell of a lot compared to some editors I know and use but it still has some minor issues like this:

Probably a nit pick but in my work I get customers wanting to transfer phone videos onto DVD for their relatives and it just seemed odd that Cyberlink decided not to have this feature.
Personally I think you will love this program once you give it time and try out all its features.