The ezcap 170 doesn’t disappoint. I admit, I thought this was going to be another simple capture product but it’s at another level.
For a small amount, you actually get a fantastic device that (finally) comes with a better software than the Honestech kind.
There does appear to be a slight better build quality with the name ezcap. Just to let you know if you google ezcap 116 or ezcap 170 in Google images you will see the same product.

Sometimes human error can make you think there is something wrong with a device but I’ll get to that later.
Was everything all rosy though? Do I think this is the be all and end all?
No.
But if this is all you are willing to spend on these type of capture cards then definitely the ezcap 170 will get you some great results.
I ended up using this model when I compared a cheap capture card to a dedicated FireWire card.
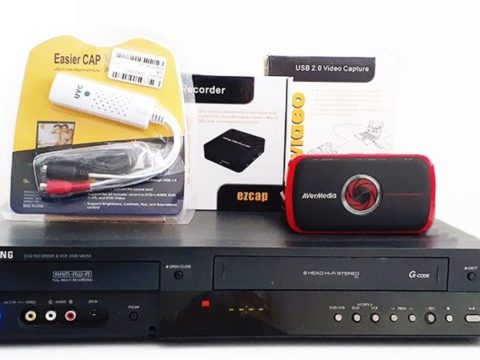
What’s in The Box?
The fact that this is packaged in a box and not some kind of toyish plastic packaging already gives a sense of a quality product.

It is only packaged with a full size CD, instructions and the device itself.

Speaking of the device, it is made with a durable plastic keeping the connections secure.
The black button can be clicked but I didn’t test that while I was recording. For some reason it didn’t cross my mind to check what the clicker actually does.
In all fairness the videos I tested didn’t need to be paused (if that’s what it does).

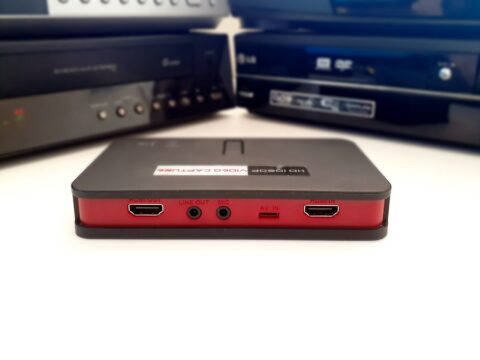
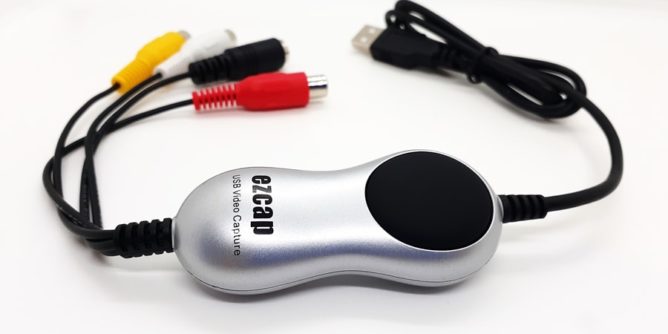
The USB is a 2.0 and stretches out to 32 inches. The fact that this is one long cable and not a USB extension means you are going to have less connection issues.

The video signal input is via composite connections.
Yellow for video and Red/White for stereo audio. The option for S-Video is there as well.

Connections is straight forward by matching the corresponding links.

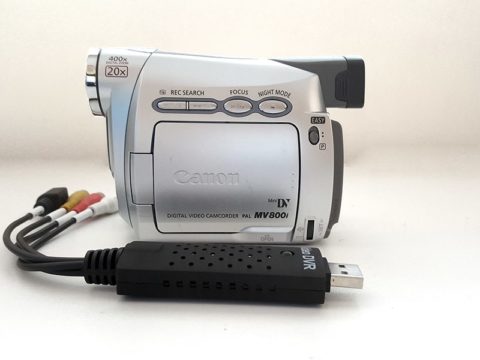
Something I do like is the long cable which means leaving the ezcap 170 closer to the device or on a table and not dangling from the USB port on your computer.

While these devices are not heavy, their USB ports can bend due to gravity and weight.
That’s why I never understand people who have USBs on key chains. It’s like watching Uri Gellar bend spoons.
Plug in the USB with a thousand keys on it then watch as it slowly bends at a right angle … like magic!
Installing The Software
Sometimes the instructions are there for a reason.
I installed the ArcSoft Showbiz software and then plugged in the ezcap 170 thinking that would work.
It didn’t.
When installing the software do make sure you install the driver. Then make sure to restart your computer.

I installed the ShowBiz 3.5 software first then installed the driver.

The software will give you a licence agreement that you can just click through.

You will also be asked to supply the licence key which is on the CD envelope.
Install will take only a few minutes depending on your computer.
ArcSoft ShowBiz Walkthrough – Capture Module

And this is what this software finally looks like.
From the top left are we have three modules:
CAPTURE – This will allow you to capture footage using the ezcap170.
EDIT – A basic editor for your clip.
PRODUCE – Will allow you to burn a DVD or export as a digital file.

The top right hand corner you will see an E.
This will hilariously keep you updated with any information available for patches, upgrades, special downloads or promotions.
I’m guessing ArcSoft haven’t had any demand for updates in a while.

Having the driver installed, you can click into the Capture Module to see the source is recognized as the ezcap video grabber.
Changing the device settings will change the contrast, density, hue etc. personally I never change any effects using these primitive settings as they can be better adjusted using an editor.

The ArcSoft capture module will tell you the capture duration (once finished), the eclipsed time (current running time).
You can also enlarge the capture window to fill the screen and take random snapshots when desired.
Once completed, hit the stop button.
ArcSoft ShowBiz will take a few moments to process the footage.

You will then be placed into the Edit module with your finished video shown as a thumbnail.

Right click on it to check the properties.

The file size shows it is 1.35 GB in MPEG-2 format.
ArcSoft ShowBiz Walkthrough – Edit Module
ArcSoft ShowBiz does offer some simple editing and effects you might want to add.
They’re lined up in four panels as LIBRARY, WIPES, EFFECTS and TEXT.

The Library Panel allows you to sort through your project files by music, pictures, videos.
There is an option that says color which brings up a variety of colored backdrops which I assume is really for laying text over?
They don’t make it too clear.

The next panel is for Wipes. Simply choosing one and dragging it between the clips will produce the wipe effect.
To be honest, there is definitely way more than you will ever use for a home video.
If you making a slide show on the other hand – you could get something creative.

Third panel is Effects and unless you were going for a black and white look – I would avoid.

The final panel is Text. A variety of styles are available, each more glaring than the last.
When you drag a font style you like to the clips, ArcSoft ShowBiz will automatically change to Timeline mode.
You will be able to edit the text and place it anywhere on the timeline.
ArcSoft ShowBiz Walkthrough – Play back window

The play back navigation functions are limited to say the least.
PLAY – allows you to play the entire project. Tapping space bar will pause and play respectively.
REWIND – takes you back to the start of the video.
ACTIVE CLIP – this will play only the clip the scrubber is highlighted over. For example, any edited smaller clips.
ENTIRE PROJECT – allows you to watch through the entire project.
Further along there is a volume slider, full screen option and entire project/clip duration times.
ArcSoft ShowBiz Walkthrough – Timeline
In Timeline mode the software more resembles a better quality editor (with its limitations).
There are + and – symbols that will allow you to stretch out the timeline and zoom in further similar to the Audacity audio program.

The editor will display the all the tracks available to use and be aware you cannot add more video tracks.
You can mute the original audio track if desired.
You cannot separate the video and audio track but you can add more audio.
Above the Timeline there are options that include:
TRASH – allows you to delete the project or selected clip.
MICROPHONE – for adding commentary via a microphone.
EDIT EFFECTS – ideal if you want effects on certain segments of the clips.
EDIT TEXT – change the text written.
MULTIPLE TRIM – brings up a new window for editing.

Double clicking on the trim function will open a new window allowing you to find tune your editing for precise cuts.
ArcSoft will create start and stop points and use the middle section for the edit.

This method of editing can be done throughout the entire project thus creating smaller chunks to work with.
When you’re happy with the edits simply click OK to be taken back to the timeline.
Arcsoft ShowBiz Walkthrough – Produce Module
Under the Produce Module there are three options which are Create DVD, Create File or upload to YouTube.

Simply clicking on the Create DVD button will open a new window to a fully fledged DVD authoring program.
I have to say I was impressed.
Considering the ezcap 170 was just on $20 from eBay and it came with software that would likely charge just as much if you bought it by itself.

The the DVD setup you will have options to change the look of the home screen.
Along the left hand there is a Theme tab which has categories for backdrops to cater for all sorts of occasions.
There is even an animation menu if that’s your thing.
The image and text are all editable by double clicking on them.

A smaller box will open allowing to change font styles and color and layout.

There is an option to add or delete more text.

Layout will allow you to add thumbnails that can be used as the chapter selections.

Customize has a variety of options for adding your own background theme, music or even an intro video.

A preview tab will allow you to see how the final DVD home page will look.

To complete the DVD, click on the burn icon.

There are also options for saving the project in case you need to get back to it at a later stage.
ArcSoft Produce Module – Create a File
Export options are varied as well, not that you will probably use some of ArcSoft’s suggestions.

Quality settings can be changed in a simplified control scheme.

Formats will have an impact on the size of your final rendered project , so you will need to keep that in mind.

Export will also vary in time depending on your computer specs.

Choosing an MP4 format in highest quality settings gave a file size larger than the original MPEG-2.
Conclusion
The ezcap 170/116 is a solid performer. Making sure that you install the CD drivers and restart your computer, you shouldn’t have issues.
Overall the software alone is worlds beyond Honestech’s.
Even if the software isn’t to your liking you can always go with free OBS Studio.
Arcsoft ShowBiz 3.5, while being a mediocre editor, has an astounding DVD authoring software.