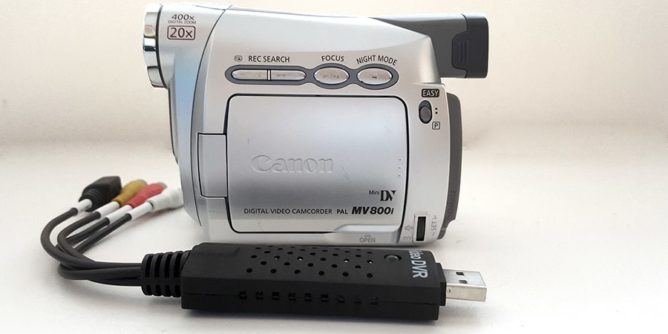
When I first saw this device I admit I was skeptical. And I still am.
You see, I don’t love this device, but I don’t hate it either.
It just kind of grew on me when I worked out how to get around its kinks.

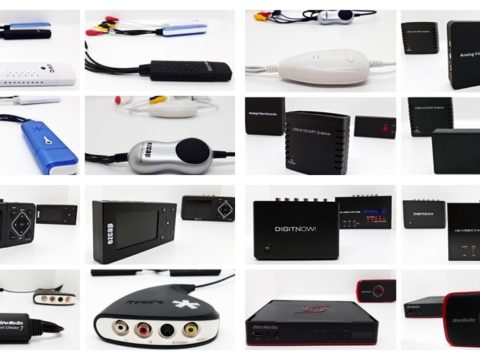
The problem with these small USB capture card adapters is that they all look the same. I mean this one for example, was bought from Ebay for less than ten dollars with free shipping.
I figured I want to start reviewing all the VHS to digital capture devices I can get my hands on – no matter how cheap and nasty.
This device is extremely close to the UCEC USB 2.0
- Video Capture Device-Connect the analog signal video recorder with your PC/Laptop and Achieve the conversion to digital...
- Video Capture Card-Capture High-quality Video & Audio through popular USB 2.0 interface and not need external power
Last update on 2024-05-01 / Affiliate links / Images from Amazon Product Advertising API
And I thought this Video DVR device was going to be a nasty time. Turns out, it’s not that bad, with one caveat – but I’ll get to that a bit later.
What’s In The Box?

Buying this from Ebay I wasn’t expecting much and that’s what I got.
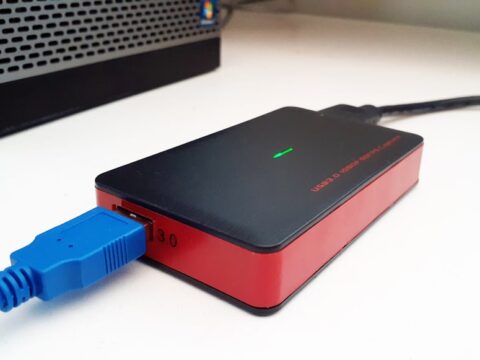
The Video DVR comes with the capture card itself, driver software and a USB 2.0 extension connection.

The USB connection when extended will give you an extra 50cm of space between the computer and the Video DVR capture card.
I was able to plug the device directly into a USB port on my computer without any risk of it falling out.
Although I can see if you only have vertical USB slots on your computer this capture card can start to dangle precariously.

Connection is via an RCA composite input and an S-Video.

The other end of the device comes with a protective cap covering the USB.

When plugged into the computer, the Video DVR will indicate it is connected via a green light.
I tested the capture card on a Windows 8.1 PC and had no trouble with my computer recognizing the Video DVR.
Installing Supplied Software.
The device comes with a simple CD to install software.

On that CD you will notice it says Windows XP, 7, 8, 10 also Mac OS and Linux.

When I explored the whole disc there isn’t any tar files or dmg files. Just windows. Interestingly I decided to read the manual before installing any software just to see what is involved.

The manual says it comes with Ulead VideoStudio SE DVD. That software was bought out by Corel and has long gone.
I have a review of Corel’s latest VideoStudio Pro 2019 which will connect with this Video DVR.
Going through the internet archive I did find this version of Ulead Video Studio 3.
But that isn’t the software that is supplied. The software is something totally different that the manual fails to mention at all.
In fact, the manual is useless.

Opening the TVR25 folder, there is a basic setup for PC only. The software will ask for a serial number so be aware it is hidden in that folder under the name SN.

Installation is painless although reminiscent of the windows XP days.

Finally we are presented with the Honestech TVR software.
Well that doesn’t look like Ulead software to me.
Software Walk through.
So it doesn’t come with the software it claims to, is that a big deal? Does the supplied software do the job?
Well yes.
And it isn’t that great.
It just feels like it belongs in such an old computer era, not that I can talk.

I’ll cover what the other buttons do on the software but first I would like to draw your attention to this button, as this brings up the property settings.
I mean we’re here for recording your old VHS tapes right.

With the Video DVR connected via USB, the software instantly saw the device as USB 2.0 PC CAMERA and also the sound. That’s good.
Along the left side there are three tabs. The first is:
Video Settings – which will let you change the Brightness, Contrast, Hue and Saturation. Personally I wouldn’t change any of those settings from a capture device as those adjustments can be done to bettereffect in a video editor.

Record Settings – Here you can change what type of file you want to record as. And this is where things get interesting.
The Video DVR will see the correct video size (720×576) and let me change aspect ratio in MPEG-2.

But for PAL region I can only still only record as 25FPS. Not the end of the world I guess, but certainly not something to get excited about either.

There are other options to record in like DVD. Also adjusting the quality, bitrate and encoding speed will increase the quality.

Except when it comes to MP4. The most popular format can only encode in set parameters that are grayed out and cannot be changed.
Why?

Etc Dialog – allows you to surf channels at once if you have that ‘Big Brother monitor everything at once‘ desire within you.
So yes if you still watch TV through your PC, you could record it.

From left to right you have the Record, Play which is just strictly for the recording and playback.
Then there is the playback functions for videos recorded.
You can adjust the volume within the software.
Below that you can set the timer for recording TV, Property settings, change the blue skin color to green (because that’s important), take a snapshot of the video playing etc.
Basically there are functions you won’y waste time with.
Back to the interface, if you click on the TVR tab (yes the word is a tab) it will take you to Honestech.com.

So it begs the question, who made the Video DVR?
I know these cheap VHS recorders are generic, but it would appear that Honestech doesn’t have this device listed as theirs.
Maybe they just supply the software.
Or maybe this Video DVR is really old.

Their own products seem to be under the VIDBOX brand. I’ll be sure to buy those later on and test them out.

There is a tiny arrow point that will let you drop down the menu to show the videos that have been recorded.

You can also view those as thumbnails.
Software Alternatives – Is it Compatible?
So I haven’t wrote about the recording. Were there any issues?
Using the RCA cables, the video was captured at the maximum settings the TVR software would allow and the results were adequate.
I did try using a S-Video cable connection as well and that did drop out frequently into a blue signal. Definitely not worth trying that method.
I first tested it with PowerDirector 17 in the capture module which I wrote about as the best video editor for beginners.
I thought I would test the Video DVR with OBS Studio, the free screen recording software.
And suddenly this little device seemed to magically improve.
OBS Studio let me control the frame rate at the correct 50FPS giving a much smoother video. Trying the S-Video signal and I did get the drop outs again.

The only other drawback ( I guess) was that OBS Studio didn’t have 720×576 preset. I know I can’t complain and I just used the 1280×720 preset.
What this told me was that these generic VHS transfer capture cards can record at the higher frame rate and it is just their software that is holding them back.

Details of the OBS Studio seen above.

Playing the video back and we can see the large black borders.
Conclusion.
If I had to fault this product it would be the fact they don’t know what software they are supplying. But who do you complain to?
This device was bought from Ebay for ten dollars. You get what you pay for.
Luckily, because of the free OBS studio that works with the Video DVR USB 2.0 – it becomes a great investment.
Would I use this to record my home videos?
Yep, but I still wouldn’t throw out the cassettes until I knew for sure that was the best quality I could get from them.


