Ashampoo creates some very reliable software.
I’ve been a fan of their software for a while and for some odd reason it never occurred to me to try their free version of their Burning Studio.
I just recently had purchased the full version to do an in depth review but I thought I would look into Burning Studio Free first.
There are two versions: one being the somewhat limited (but definitely polished) free version and the full paid version, which I might add is cheap for what it offers.
The free version is fast and efficient. I’ve never encountered a burnt disc that had a read error.
Could be I’m lucky.
Once you have downloaded the software, double click it to start the install process.

You will be greeted with setup window.

Then have the choice of location to install the program.

Ashampoo Burning Studio will complete the installation taking a few minutes.
Is Ashampoo Burning Studio Free?
One of the two reasons why people may be afraid of installing the free version is the extra shopping deals icon it places on the desktop.

This Ashampoo Deals (from what I’ve tried) doesn’t have an uninstall option by itself.
If you uninstall the main program then it will take the Ashampoo Deals away.

The next disconcerting thing is that Ashampoo will ask you to create an account.
So you will enter your email address.

Specify a password for the account.

Ashampoo will send an activation email which is almost instant.

Verify the email address and you’re done!
So why all the hoops to jump through just for a free software?
Think of it like this: Ashampoo is giving away a free polished software and all they ask in return is an email, so they can send a possible deal you might be interested in at a later time.
Even brick and mortar stores ask for email addresses and that’s after I bought something, not by getting something for free.
Every now and then a deal will pop up from their online store as you start up the program.
How Do You Use Ashampoo Burning Studio.
The layout is very minimalist and easy to understand.

All options are along the left hand side with only minor settings that can be changed in the upper right corner.

The service tab at the bottom left will highlight if there are deals or updates for the software or general troubleshooting.

BURN DATA – This allows you to burn any kind of data disc to a CD or DVD.
Ashampoo will automatically recognize a new disc and the disc size; thus telling you if there is enough space on the disc.
Update Disc – will only work on a re writeable DVD or CD.

AUDIO and MUSIC – you have a variety of popular options like:
Create Audio CD – ideal for car CD players.
Create MP3 or WMA Disc – What I find interesting with this vs just making a music data disc is that you get an option to increase the data bit rate which in turn will increase the quality of the CD sound.
Copy Music Files To Disc – This creates a CDFS file for the CD.
Rip Audio CD – Allows you to rip an audio CD into MP3 files into the My Music folder (or chosen by you) on your PC.

MOVIE – Gives you three options. Two of which are pointless in my opinion.
Video DVD from Folder – Will let you create DVD from a TS_file. I go into an example further down.
Video CD – if (for some reason) you wanted to burn a VCD.
Super Video CD – Same as VCD only slightly better visuals.

COPY DISC – This will let you copy any form of disc. If it’s a DVD – you will be able to copy it to another DVD (ones that are not copy protected I mean).
Copy a CD to another CD or backup a data disc.

BACKUPS – This option will let you make a backup of files on your computer and send to a CD/DVD/BlueRay Disc.
You can even send it and encrypt the files onto a USB.
How Do I Burn A DVD?
When it comes to free DVD software they all seem to have one thing in common which is they seem to only burn Video_TS files.
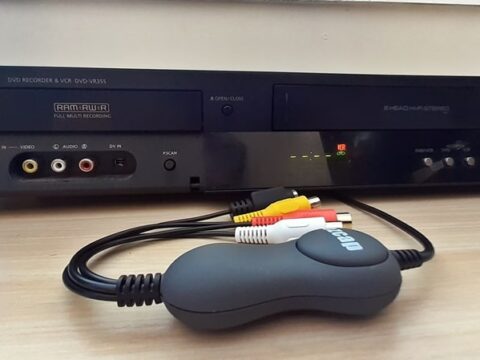
Here’s the problem, you have a cheap capture card – you record your VHS to AVI or MP4 – then you have to change that into another format just so the free DVD software can burn it.
Seems like a lot of steps.
But if you are going the free route then it won’t feel like a nuisance.
With all that being said if you do have a Video_TS file you can burn it so it will play on a DVD player.
Click on Movie along the left hand side menu.
Then select the Video DVD From Folder option.

You will be able to give the DVD a title.
Click on Browse to point the program to the Video_TS file.

You can add more video files from the right hand side using the plus symbol or the folder icon.
When you are done click next.

Ashampoo Burning Studio will automatically detect what type of disc you have and tell you if it’s writable.
There are settings below that allow Simulate, Verify, Finalize (it’s going to do that anyway) and so on.
Unless you have an old computer that you don’t trust, I cannot see a reason to simulate a burn.

Last option is if you want to change the speed of the burn. The speed settings I usually do drop to a lower speed as some DVD players won’t play them.
With everything good to go, click on Write DVD.

DVD burning speed will vary on your PC burner capacity.
How Do I Burn A CD?
Burning a CD is similar to the process as mentioned earlier.
From the main menu click Audio and Music then choose what type of CD you are making.
For this example I chose Audio CD.

You can simply drag an audio file into the project box or click on the blue plus symbol to add music files.

Along the bottom you will see how long in duration your music file is.
There are two settings along the right hand side that can be changed.

The first is the Normalizer allowing you to change the decibels.
The default setting is just fine.

When un-ticked this allows you to manually change the volume of the tracks.
But keep in mind this across the whole CD, not individual tracks.

The second setting allows you to add a two second pause or just have the songs mix together as one ends and another starts.

Ashampoo will again recognize what disc you have inserted.
Options to change the burning speed to slightly lower is recommended.
The write settings on the left hand side can be altered if desired.

Depending on the file length of the CD project, the time it takes to burn will vary on your computer.
I personally found it to take approximately five minutes to burn for a forty five minute audio track.
Conclusion
Ashampoo Burning Studio Free is ideal if you are needing a free burning tool to create CDs or data backup.
If you can get past their sign up and create an account then you will like this version. It’s unobtrusive and very efficient.
As far as the DVD burning side I’m not liking the too many steps just to burn a disc.
Overall still a great product and worth a look.