Do you think there is a factory somewhere that still makes these VHS capture cards or did they make thousands upon thousands devices years ago and just hope they’ll sell.
This particular EasyCAP DC60 states that it only works with XP or Vista, so I thought great I’ll have to search for drivers.
Turns out I didn’t have to. It worked for me out of the package.
Actually it worked on four of the six computers I tried. And those two computers it didn’t work on sometimes cause me issues.

The EasyCAP DC60 (also known as the easyDAY), captures NTSC at 30FPS or PAL at 25FPS.
- ChipSet UTV 007
- Support For All Formats: record in DVD+/-R/RW, DVD+/-VR, and DVD-Video
Last update on 2024-10-22 / Affiliate links / Images from Amazon Product Advertising API
But that’s if you’re using their software. As OBS Studio worked fine for me at higher frame rates.

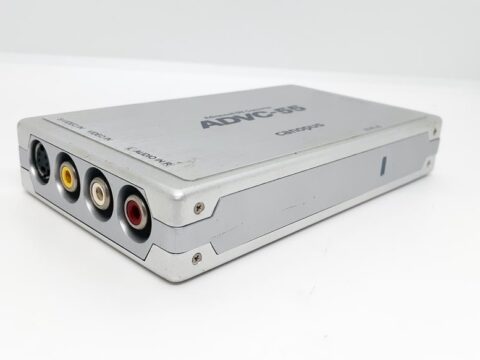
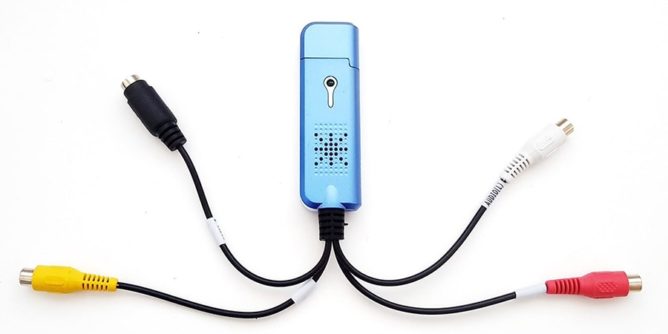
It comes with the standard Composite cables. Yellow for video alongside an S-Video connection. . Red and white for both left and right stereo sound.

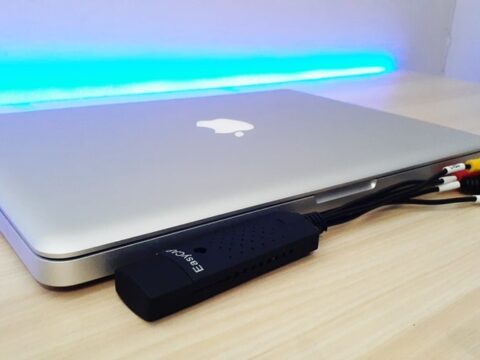
The EasyCAP will light up green once the device is connected to the PC.

Connection is via USB 2.0 with an extension cable supplied.
I did have to use the USB extension – as the device is slightly wider than the Video DVR. It just felt too loose connecting to the USB ports on my computers thus giving me connection issues.
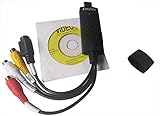
What’s In The Box?
This EasyCAP DC60 arrived in a sealed plastic package from DX.com.

These capture cards come with an installation CD, a USB extension cable and the device itself. Bland but what do you expect?

I plugged the EasyCAP DC60 into several PCs each running various windows OS.
The main PC I test these capture cards on runs on Windows 8.1. That didn’t have any issues what so ever.
Next I tried my son’s Windows 10 PC. Again drivers for the device installed fine.
I then tried on four (yes four!) Windows 7 PCs.
Two worked. Two didn’t.
The two PC’s that had trouble installing drivers were not connected to the internet. Does that make a difference?
Possibly.
All other PCs had internet access and didn’t ask to manually search for drivers.
If you do find yourself having issues with installation try this website to download the drivers.
Installing The VHS to DVD 3.0 Software

Exploring the disc we can see there is a notepad file saying Key. This is the serial number for the software to install.

Running the setup and we are introduced to my old software friends https://www.honestech.com.
Which does beg the question?
Are Honestech the only company that makes software for these type of capture cards? Probably a stupid question, but it certainly seems odd that two different devices I have tested have the same company software to install.
Just saying.

In order to read the manual there is an option to install an Adobe reader from 2008 .
This isn’t necessary at all, I just wanted to show how old the installation is.
The good news is the user guide does actually cover the software it has installed.
VHS to DVD software walkthrough
Once the software has installed there is an option window that will boot up called change video input standard.

There are different regions that you can set as default. This can be changed at any time.

This is what the main program looks like. Along the top are the three modes: CAPTURE, EDIT and BURN.
Along the right hand side there is the Record button and Stop button.
Finally below them there is the options button.

Clicking the option button will open a new window.

This new window allows you to choose the capture card device for picture and sound.
The first option that can be altered is the FORMAT. Problem is that DVD is the best quality to choose from so you wouldn’t want anything less.
Does anyone use VCD’s anymore?

The format settings on the DVD drop down tab opens to different (but lesser) quality options.
Video type changes whether your disc will be in PAL or NTSC region.

Below that is the quality setting. Options to choose there are BEST, GOOD, NORMAL and AVERAGE.
Something of importance that I didn’t check, is that best quality would only record as a maximum of one hour and ten minutes. Seems odd.
My test was for only half an hour.
VHS to DVD software – Edit Options

Just of note in regards to this software. Don’t expect to open any other format other than the given MPEG, AVI or WMV.
The program will not recognize any other popular format.

Once you have captured your video footage a thumbnail will appear along the right hand side.
You can add more clips (as long as they are compatible).
To edit any clips simply drag the thumbnail to the timeline below the preview screen.

Highlighting the clip will allow you to move the cursors to shorten the footage. It is then saved as a new clip.
There is also a further option to edit the color balance.

That being said, this is a limited color balance option that will allow you to change the way the video looks. To be honest I wouldn’t change any of those as you would get a much better result in a more upmarket editor or one that I tend to use more is Magix Movie edit Pro.

Dragging another clip onto the timeline will allow you to add a multitude of transition wipes. I couldn’t imagine you using any of them to be honest.
To really show the age of the VHS to DVD SE software, you can export to a PSP or IPOD.
You can also save the finished to AVI or WMV.
VHS to DVD – Burning Options
So yes I have bagged this software but I will give it credit for at least having a burning option. It does make an effort and while I can’t imagine what price this software must have charged back in the day.

The DVD home screen can be edited in a variety of ways giving freedom for creativity.

Along the bottom of the screen there is a button that will will give the relevant disc information.

Along the top you can once again change the type of disc you want to create.

You can add various thumbnails for each chapter. Ideal if you do have a long video that you have broken up into smaller segments.

Changing the background image, the location of buttons and the style of buttons if you desire.

Double clicking on the text will open a small window for you to change the title of the DVD.

Font size and color and style can be edited as you want.
All basic but easy to follow steps for burning.
This sample that I burnt was only a half hour test and was completed in approx ten minutes. That varies depending on your own PC specs.
Software Alternatives – Does it Work?
Testing the recording of the EasyCAP DC60 on OBS Studio I didn’t have any issues.

The program recognized the DC60 in the PC and allowed for uninterrupted recording.
Personally, OBS Studio would be the way to use these capture card sticks.
Conclusion
Is the EasyCAP DC60 better than other capture cards?
No. Certainly not.
For starters, the packaging says it only works for Windows XP and Vista and yet it worked (partially) on Windows 7, 8.1 and 10.
The actual device is slightly heavier than other capture sticks and thus makes it feel not secure in a USB port. Definitely need to use the USB extension cable.
The software is okay I guess. If you use other free and better software you will have great results.
The advantage it does have is price. These capture card sticks are so damn cheap!
If these style of cards are all you can get at least look around for some that definitely are compatible with up to Windows 10 and just use other software.