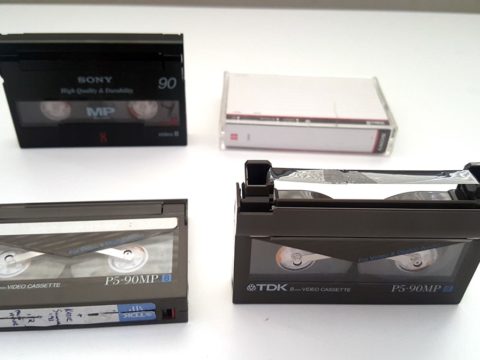
Before I purchased this AVerMedia device, I initially thought is there a device that someone could literally have all their home videos transferred onto like a DVR?
Turns out there is, in the somewhat elusive hard to find AVerMedia C285. A gaming capture box that has the advantage of adding a 2.5 inch hard drive to store your videos.
I decided to go with this device thinking that AVerMedia hasn’t let me down so far.
I’m not going to gripe (much) but after playing around with this machine, I now have a new respect for the ezcap 283s.

On their Japanese product website it is called the C285 but there also appears to be this version as well.
What’s the difference?
I have no idea. They both have the same specs as far as I can see.

The main specs that I liked about the C285 are:
- Internal storage possible. I used a 1TB hard drive to test on.
- Will let you record from HDMI or Component.
- Records in MP4 format.
- Has built in editor.

- Stream and record Xbox, PlayStation, WiiU, Nintendo Switch, or NES Classic Edition console gameplay.
- Capture in full HD 1080p directly to USB or internal storage
Last update on 2024-07-15 / Affiliate links / Images from Amazon Product Advertising API
The last point had me curious as to how someone can edit on a device that doesn’t need to be plugged into a PC.
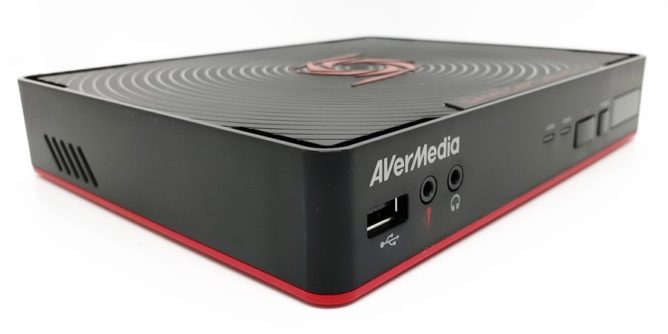
AVerMedia C285 – A Closer Inspection.
This AVerMedia capture box is well built and measures approximately 20cm x 15cm.

Along the front panel there is:
USB 2.0 connection – You can record to an external hard drive as long as it’s formatted to NTFS, other wise it will not be recognized.
MIC INPUT – Really for gamers who are doing voice overs during game captures.
HEADPHONE INPUT – For headphones.
HDMI/COMPONENT INDICATORS – The device will light up what cables are connected. Mind you, this is after you have indicated in the menu system.
RECORD – The record button. But you will find out later that you won’t really need to use that button. (That comment makes sense later in the post)!
POWER – The on/off switch.
The last black panel is for the infrared receiver.


On either side of the C285 are air vents for the hard drive.
The device does get warm, but certainly not hot to touch.

The back section we have:
COMPONENT INPUT – The option for component cables over composite means the picture signal will be clearer.
My Samsung DVD combo gives the option to output a VHS signal through component, which I used for testing.
HDMI IN – Recording from a HDMI source is possible. The company makes it obvious they don’t want you to record HDCP footage, which is fine and understandable.
Just don’t be overzealous with it like some capture devices.
HDMI OUT – This will allow you to see the image played through to your TV.
LAN CONNECTION – The device will allow you to connect to the internet to upload to a YouTube Channel.
I thought this was an interesting touch, especially if you were transferring your old home videos. You could use the device to do the uploading of lengthy videos.
AVerMedia C285 – Inserting a Hard Drive
I was eager to see if adding a hard drive would be any different in speed vs using a USB 2.0 thumb drive.

Opening the back cover is simply holding the lever in and pulling the lip up.

The connection inside is for a 2.5 inch SATA hard drive. The same as the portable drives you may plug into a PC.

A closer image shows the way it’s facing.

A mistake I made was thinking I could insert a hard drive and then be able to format it using the C285’s menu settings.
This is not the case.
You really need a NTFS formatted hard drive before you commence to use this.

Make sure you have the hard drive SATA connection facing the right way around.

The hard drive fits snugly into the box and joins into the connector. You do have to slide it until the hard drive clicks into place.

Once connected, the only thing left is to place the cover back on.
AVerMedia C285 – What’s In The Box?

The AverMedia C285 comes in a neatly packaged box containing the device itself, a large instruction manual, a quick start guide, HDMI cable, remote and a power adapter.

The user manual goes into depth about the setup and the quick guide only covers cable management and simple menu settings.
I know I’m old school when I say I’m glad to see a proper book type manual vs everything being a PDF.

The HDMI cable supplied extends to a meter.

The remote supplied comes with two AA batteries and is relatively small.

Where things do become interesting though is the fact that you have to use the remote in order to use the C285.
The device menu setup can only be accessed using the button arrows of the remote.
Built in editor, only controlled via the remote. And so on.
I don’t have a problem with this, but I do find it fiddly.
Due to me complaining about other brands supplying remotes, I do find it funny that there is finally a device that proved me wrong about needing a remote.

The power plug supplied will cater to world wide voltage settings.

An added touch is the detachable adapter socket. Mine came with the Australian prong connectors.

One thing I haven’t mentioned is that there is an app that can be downloaded called GameMate, available for iPhone and Android.
So what does this app do?
It allows you to press record from your phone.
So you can hit record from the capture box itself, press record from the supplied remote or download an app and then tap record from that instead.
I’m being facetious and I’m sure there’s more that the app can do. But I’m coming at this from a record your old video tapes angle, so I can’t see the use of adding an app on a phone.
AVerMedia C285 – Setup
Set up with the C285 is an easy walkthrough.

With the capture box powered up, you will be greeted with the language preference.

The Audio/Video pass through just means so you can see what is being played on a TV as you record.

Selecting OK will automate the Network connection.

In this example the Storage Destination was not set due to the first hard drive I used was not formatted to NTFS ( I had thought it was at the time).

If you do receive errors, they could appear like this, where there is no storage detected and no INPUT option selected.

After changing hard drives I restarted the setup once again and the drive destination was automatically recognized and given a time amount left of storage.
The reason the internet symbol has an X was simply me not plugging in the Ethernet cable as I figured I didn’t need the internet until after I had at least transferred and tested a tape.
AVerMedia C285 – File Management
I won’t explain the direct Menu order and instead do the Media Studio last.

File Management allows renaming and moving or deleting of files.

The C285 states that it only supports the files that it captures, so I decided to test that.
Turns out to be true. Video files that I captured on other devices did not appear, even if they were in the MP4 format.

Both partitions can be shown at the same time. One partition will be the internal hard drive and the other would be a USB hard drive.

The above example shows the file highlighted which was from a 3 hour VHS cassette. The files size was 9.7GB which is reasonable.
AVerMedia C285 – Settings
In the Settings option there are many things that can be altered. Using the arrow keys onto the chosen setting and selecting OK will open new options.

Some of the different settings that can be changed vary from language, network, date and time, Disk Management.

Under the Disk Management I made the mistake to think that formatting could be done by this device.
It just shows the size of the disk and its destination.

Network Settings can be done manually or as Auto assign.

Component or HDMI can be changed here as well.
I noticed the Firmware Upgrade was already set at the latest version according to the product site.
One setting that definitely needs to be turned off is the AVerMedia watermark.
I know my video was just for test purpose but sheesh, what are they thinking?
There is no warning in the whole setup procedure that there is going to be a watermark on your video unless you turn it off manually in the settings.

I get that gamers would want a watermark on their video gameplays, but even then, people would find out the hard way after several hours that there is stupid watermark of a company in the top left corner.

Depending on the external device you may be using, the only INPUT options for the C285 are component and HDMI.
There is no composite.

If your VCR only had composite OUTPUT and you were using this device, then I would suggest buying a CM401 composite to HDMI adapter.
Depending on the brand, you would be looking at an extra $20.
AVerMedia C285 – Media Studio
So finally we have the Media Studio which is interesting as it’s the first (that I’ve encountered) device you can edit via the remote.

By selecting OK you will be greeted by the video library. In my case there is only one video for the test.

Highlighting the video will give new options to select via the remote.

From here you can change the file names, edit the videos or share onto YouTube.
Sharing onto YouTube will open a wizard to guide you through entering your gmail account that has your YouTube account.

In the edit mode, you might be told (in my case) that the video is too long.

The instructions for the edits are simply using the UP/DOWN arrow keys to skim through the hour footage, and again using the LEFT/RIGHT arrow keys to move through the minutes.

After reading through the instructions, you will have to wait a moment for the selected video to load.

Along the top of the entire footage is a transparent timeline.

leaving your finger on the arrow button will make a red marker skim from left to right.

For the above example I stopped the cursor at the 1 hour mark.
Selecting OK will leave a white check point.
Using the arrows again will let you continue to move through the footage.

I stopped the cursor at the 2 hour checkpoint and created another check point.
At this point of the timeline I now had three segments.

With the segments I can now switch between any of them and simply delete what is not needed.
In the above example, if I just deleted the middle segment then the first and third segments will automatically be spliced together.

I decided to delete two of the segments to see how fast the C285 could export.
AVerMedia C285 – Exporting

With just an hour of footage the C285 said it would take approximately thirty minutes.

Selecting OK on the remote let the device go through the export process.

For the record it had taken about twelve minutes to export the one hour clip.

Back into the library and the newly created file is above the original video.
Conclusion

After using the AVerMedia C285 to record a 3 hour cassette I can honestly say it does the job fine.
But, if you wanted a device that had all your old home videos stored onto one hard drive, then I’m not sure this is worth the effort.
If you were going to copy the videos to other computers then you are better off recording to an external hard drive via the USB.
The DigitNow! reviewed here is way cheaper and does the exact same thing, without the built in hard drive option.
That being said, if you were recording with this device only (and no computer), then yes it’s a good buy. A little expensive but a good buy.
The C285 allows you to edit with a simple yet very effective built in editor and share directly to YouTube or save to an internal hard drive. I have to say, that no other capture box will allow for that.
If it was a tad cheaper it would be a great deal.