The unfortunate thing about Video 8 cassettes is that over time they can break. Due to the small bits of plastic that are used to hold a latch.
Sometimes it won’t be just a snapped tape that’s causing an issue.
A common problem I have seen a lot is the top of the cassette lip easily flipping open.
Trying to place this type of Video 8 cassette into a camera will just give you an error and the camera could jam.
And I’ve seen that too!
Once you have the cassette fixed you can read this post about transferring it to digital.
So let’s go through the easy steps to safely changing the tape across to another cassette.

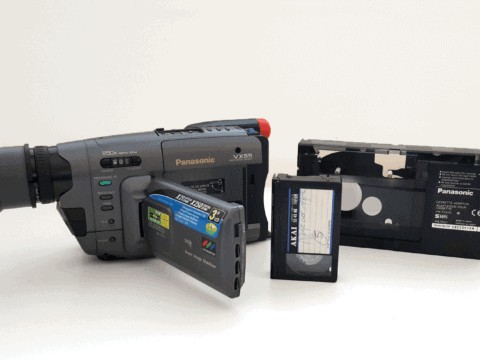
The above example video 8 tape has a broken protective lip. Placing this into a Video 8 camera will just cause it to beep and jam.
The customer wanted the video even though it has snapped and was broken.

So you will need a miniature Phillips head screwdriver. Make sure it has a long neck as the cassette holes are thin and deep.

The five screw locations are shown above . Some brands place the holes slightly different but generally they are at these locations.

So this example I will be changing the tape on the left into the cassette case on the right.
It has a T marked on it.

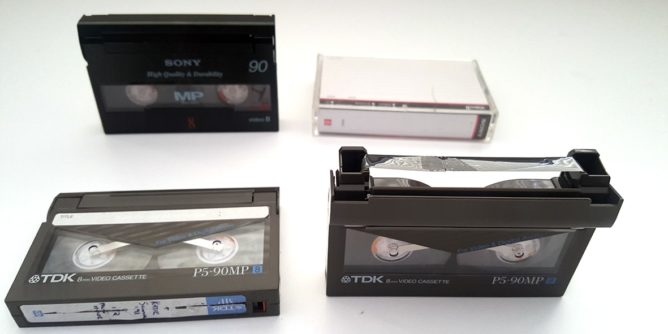
With both cassettes pulled apart, it becomes apparent that different manufacturers make their brand cassettes slightly different. Possibly to stop mix and matching?

Side by side the cassette shells look like they could be swapped by replacing the top parts.

But along the bottom between the spools, the plastic dividers have different designs.
You could try and force a different cassette top onto a cassette bottom but you might just break it doing so.
Taking out the tape with the plastic spools is quite easy and safe.
You won’t have to try and slip the tape between thin guides like I wrote about in this post swapping a broken VHS cassette.

The next step is to lift out the unwanted tape from the good cassette shell and swap the Video 8 tape over to the empty cassette case.

As long as you line the tape along the outside like the example above you will be fine. Video 8 cassettes are definitely the easiest to line up and place back.

Next is to make sure the spools are sitting snugly inside the case. Be weary of knocking out the lock mechanism in the lower right corner.
It does pop out easily but can be replaced back inside its spot.
If the the tape is loose, gently wind one of the spools to tighten.

Lift the tape flap up while joining the two halves of the cassette case together thus making it easier.

Finally, flip the cassette over and fasten in the five screws.

The above image shows the final Video 8 tape circled. In this case, the customer was going to keep the working tape. The remaining pieces I was discarding.
There may be a case where you need both tapes and I have encountered that as well. If one cassette is broken you can swap the tapes like the above guide, but then swap them back after you have digitized the tape.