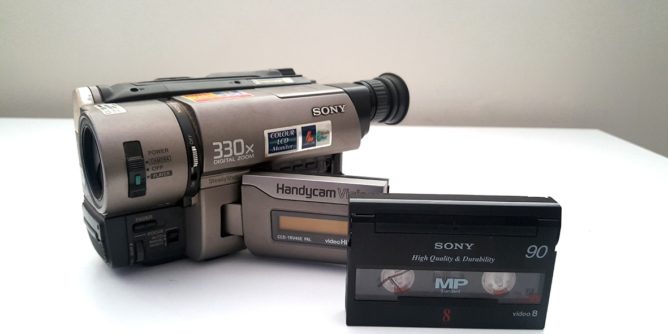
Before we can convert any cassettes it would help to know which type of camera you have just to be sure.
The Video 8 format came out as a competition to the popular VHS-C competitor in the 80’s. This was super seceded by the Hi8, which could play both Video 8 and Hi8 formats.
Eventually both of these would be phased out by the Digital 8 format. That too, came to an end of production around 2005.
The reason I brought up that history lesson is because the Video 8 / Hi8 format can get a little confusing for transferring.
Video 8 CANNOT play Hi8 tapes but Hi8 CAN play Video 8.
Get it?
If you have old Video 8 tapes that need converting and you don’t have the camera, look at purchasing a Hi8 camera second hand. It will save you the headache of wondering why the tapes won’t play a picture.
If you have a Video 8 camera in working order then you will be able to connect it to a capture card or DVD Recorder, depending on what end result you want.

Using this Sony model camcorder as an example we have the mode functions along the front of the lens.
This model is the CCD-TRV46E which was a Hi8 camera.
I was also able to make a deal with the owner of this camera as they wanted the cassettes transferred but didn’t need the camera afterwards therefor I made a deal getting the camera at a cheaper price than second hand.
That can happen a lot with outdated products that no-one wants afterwards.
No products found.
If you don’t have the camera anymore but still have the cassettes, you may be better off buying second hand model that can at least play back all Video 8 , Hi 8 and Digital 8 tapes.

The top of the Video 8 camera is similar to a VCR.
You have the STOP, REWIND, PLAY, FAST FOWARD and PAUSE.
Always make sure to rewind the cassette. Plenty of times I’ve been caught out, thinking the cassette was rewound only to play twenty minutes of footage.

Making sure the electricity is plugged in, we’re good to go. The Sony TRV models did use the same connector.

Set the Video 8 camera to PLAYER.

Follow the arrow for the eject button in order to open the camera and insert the cassette.
Connecting the Camera

The AV cables needs to be plugged in. Yellow is for Video and black cable (in my case) is to be plugged into the left audio.
These cameras were mono with their audio so you won’t have a third option with the RCA cables.

Connecting to AV input to my DVD recorder (which in turn is connected to my capture card sitting on top).
Another option would be to directly record onto DVD using the DVD Recorder, but for this example I wanted to covert the Video 8 cassette to a digital format.

At this point I will hit PLAY on the Hi8 camera and let the tape begin.

On the capture card recording software I click on RECORD and wait for the video to finish.
The capture card I always recommend you can read my post about it.
It has easy to follow software for capturing long videos.

On your computer open the designated SAVE FOLDER to find the MP4 just created.
The end result is recorded into and MP4 format that can easily be played on a computer. File size was 3.6GB for a thirty nine minute video.

Saving the file onto a USB, I can watch the MP4 video instantly on my television.
Depending on the capture card device you decide to use will vary your results.
I do recommend that you do transfer any video memories into digital as soon as you can.

