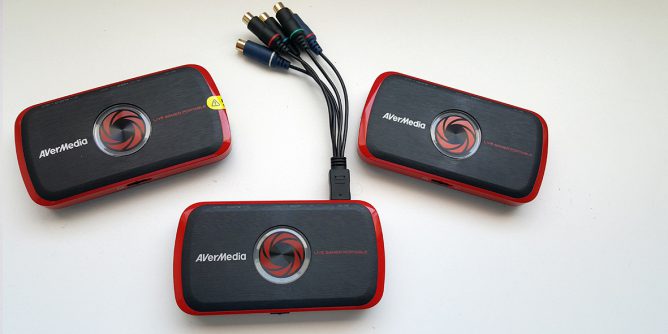
With so many VHS to DVD converters on the market, is there any device you can find that promises to record without giving you problems? I found such capture card and, it was by accident.
The Live Gamer Portable (also known as the C875) is intended for gaming enthusiasts who want to capture gaming streams and gameplay, but its simplicity and recording software make it the go-to product for connecting a VCR and video cameras. The C875 isn’t a new device by any means – but it is still sold today for capturing PS3, PS4 and Xbox hardware.
A Bit Of History

Early 2015 my son decided he wanted to record his Minecraft PS3 gameplay.
Maybe he thought he was the next YouTube star, I don’t know. I told him I would do a search for a capture card and settled on the AVerMedia Live Gamer Portable as it came with PS3 connections and appeared to be an easy device to set up.
Well, I got the capture card. Set up the connections. My son captured Minecraft gameplay and then …
… Decided he didn’t want to do gameplay videos anymore.
Well, that seemed like a waste of money. I packed it away, and it stayed in a drawer for a year.
January 2016 a customer at work asked if I had any way of transferring old VHS tapes to DVD. I do own a DVD/VCR combo recorder, so I said I’d see what I can do for them. When I brought the combo recorder to work, I remembered I still had the capture card, so I was curious to see if it could record from the VCR.
Which it did – with surprising results.
When I look back at it, I don’t know why I doubted that it could work. I think maybe it’s the marketing mindset – Oh that’s a console recording device, so it must be for game machines only!
No products found.
Since 2016 I’ve bought three Live Gamer Portables and have them set up on different VCRs for our VHS transfer side of the business.

What About Cheaper Devices?
You get what you pay for, really, REALLY rings true in regards to capture devices. If you go to Amazon and search up VHS to DVD Converter Machines, you will see dozens of little USB devices with composite cables attached.
It is hard to tell the difference. They all look the same and they should all do the same thing. But I’ll tell you what they do have in common:
- Their 1 Star Ratings.
- Customer frustrations over driver compatibility with Windows 10.
- Software asking for CD serial numbers not written on the packaging.
- Companies not replying to customer emails for trouble shooting.
- Software not working properly.
I’m saying buy the AVerMedia C875 Live Gamer Portable. It hasn’t failed me yet, and if by chance you’re still not convinced think about this:
- If the price is a turn off just remember, you could search for this device second hand and get it cheaper (and it is sold second hand on Ebay, Facebook Market, Craiglists).
- The opposite is true as well. If you buy it brand new and only need it for a few videos to transfer, you have a better chance of reselling it as opposed to trying to resell a $30 VHS converter.
- The software has installed on different PCs for me, from Win 7, 8 and 10. Yes I’m a PC guy. They do make it for Mac but not beyond 10.13.

So if you are looking for a device to transfer your VHS to DVD at home, this will be a review and guide for the AVerMedia Live Gamer Portable C875.
What’s In The Box?

Inside the box we have:
- Component cables.
- HDMI cable.
- Audio Cable
- PS3 connector.
- Mini USB cable.
- A soft pouch.

Along the back of the Live Gamer Portable we have the AV IN (which is the component cable connector, HDMI IN and HDMI OUT, Audio IN and Audio OUT.

Along the front of the device we have the option of recording to PC or SD CARD. I personally haven’t used the SD CARD option because I want to see what is happening with the video (especially if it’s an old tape that looks like it will chew up in the VCR).

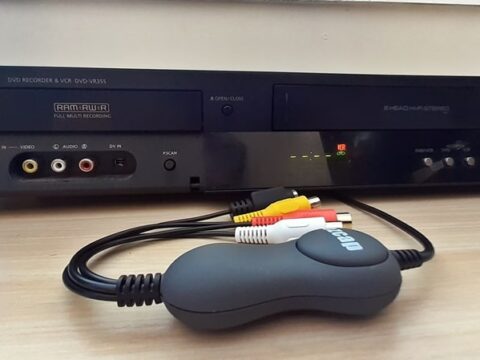
The only cables I need are the HDMI , component and the USB. Now this particular VHS/DVD recorder allows for three types of outputs – HDMI, COMPONENT and the AV OUT. When I’m capturing VHS on this VCR combo I generally use the HDMI out.
Your VCR may differ, but the most common you would be looking at are AV OUT (yellow, white and red cables).

This is what it looks like connecting the capture card to the PC via USB cable and the HDMI cable.

This is what the output picture looks like.

Using the component connector. Yes I’m aware the cables are the composite cables, I wanted to show this example.

The software recognizes the aspect ratio by using the component connector.


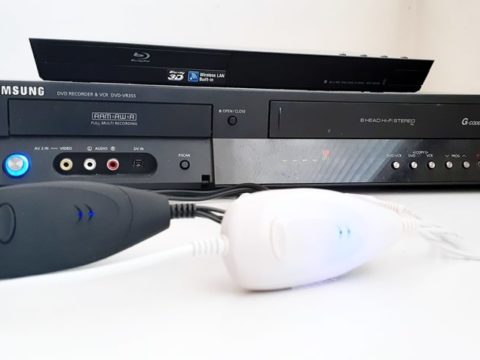
Finally we have the connection for standard AV OUT. You’ll notice the caveat to this capture card being another add-on which is an AV to HDMI converter adapter called a CM401.
There seems to be a few different varieties on Amazon but this version is Amazon’s Choice. They will all do the same thing.

The picture output on the screen.
If you were to read the 1 Star reviews on Amazon for VHS to DVD converter machine. The common problem customers experience is getting the software to install or getting the drivers to be recognized in Windows 10.
Even their highly suggested model has problems with installs.
I want simplicity with installing software – no hoop jumping.
Installing the Software & Drivers
The name of the software that the Live Gamer Portable uses is called RECentral.

Once you visit the www.avermedia.com website, you’ll be given the options for different categories. Choose GAMING.
Along the top tabs click on the DOWNLOADS TAB.

Once you are in the downloads page, click on the Gaming button.

From there click on the Capture & Stream button.

You will be shown the product range. Just scroll down till you find the Live Gamer Portable and then click on the image.

The software and drivers download option is the little green disk diagram. Click on that.

The software will ask where to download. I usually place it on the desktop for convenience. Click on the application button (the software that was just downloaded) where you will be greeted with this:

From here you will need to have the capture card connected via USB into your computer. The program software will decide what is needed. If this is the first time connecting, you will need the drivers and recording software.

Allow it download the drivers and software.

At this point you will now have the execute options along the right-hand side. Proceed with the first execute button to install the drivers.

A folder will open showing all the PC drivers from Windows 7 to 10. Just click on the version that matches your computer.

Let the drivers install.

Once the drivers have installed, now click the execute button for the RECentral software install.

A new folder will pop up. Open the folder and find the SETUP application.


You will be greeted with the install wizard. Click next and accept their terms and agreements. The install is pretty quick, so you won’t be waiting long.

And finally the RECentral software.
What I love about this software is the simplicity of one touch buttons, but also the options to tweak further in the advanced tab.
Using RECentral Software
This walkthrough will be to explain the settings I use when transferring VHS to Digital.
This is not about how to set up for gaming.

To get started let’s take a quick look down the left-hand side first. The four buttons are:
- Bulletin – This will show news and product sales from AVerMedia’s website.
- Capture – This is the screen that is showing in the above picture. It shows you the settings you currently have before recording. It also allows to use the one click button option or the wizard button, which will check what you have connected to it. (But more on that later)
- Stream – You won’t need this. It is for gamers who would be streaming on YouTube or Twitch. I don’t stream people’s weddings from thirty years ago because that would be just weird.
- Video Folder – This is a quick short cut, opening where the videos are kept. (By default it is under My Videos folder).
Out of the three options you could click on the Advanced button and change any settings that way, but I’ll show what the other two options look like.

Clicking on the Wizard button will take you to a new screen showing you the capture layout.
Make sure the game console option is checked on the left-hand side. Yes the capture card will think your VCR is a console.
Along the top there are the Video, Audio source , Video settings and Hotkeys. By clicking ready, RECentral will save any changes as a new profile so that it remembers those settings next time you open the program.

When you click the 1-Click button, a new window will open with simplified options.
Click on the Game Console button then click on detect. Make sure your VCR is on or else it won’t detect anything.

The capture card once again will detect the device and suggest the recording settings.

Finally we have the advanced button. This the option I always go to when needing to change any settings. The left-hand side is similar to the other two options: Game Console checked. Video and Audio Source cables.

The right-hand side will give you the option to change video format from TS or MP4. Personally I keep it as MP4 as I give customers both a DVD and MP4 on USB. Also if you need to edit out sections I find it easier to import a MP4 file vs TS.

Next there is the resolution. I keep the resolution the same as the VHS original because I find the image becomes stretched in a fake widescreen.

Video Bitrate can go all the way up to 60Mbps. Without getting too confusing the screenshot below from Google give the recommended bitrate.

At 12Mbps the files are large and the quality is excellent. A one hour tape will approximately be a 5GB MP4 file. Three hour VHS tapes are a little over 15GB file size.

Lastly we have Frame Rate. This is important. If you chooses the wrong frame rate the video can look choppy and the sound will be out of sync.
So what can you do if you’re not sure. You could choose the 1-Click method and let the device know what frame to pick. Or what I’ve found is if the video was recorded by a camera then usually it will be on a higher frame rate. Those frame rates are usually 60FPS for NTSC and 50FPS for Pal regions.
If by chance the VHS tape is something they recorded from the TV then it would be the lower frame rates, 30FPS for NTSC and 25FPS for PAL regions.
If you are unsure just use the Wizard button or 1-Click button then refine it by clicking the Advanced button after.


One extra area is the general settings hidden in the top right corner. When clicking on that button a new window will open.
What’s of importance is the HDCP Detection. That needs to be switched off otherwise you may get a copyright error, even though it’s your own wedding video for some reason.
Conclusion
The AVerMedia Live Gamer Portable (C875) is the ideal VHS to DVD converter in my opinion.
As I said earlier, I bought three of these machines and I haven’t had issues at all. If you have an old VCR that only has composite out, I suggest buying the CM401 adapter.
And if price is a concern, think of this, after transferring your old VHS tapes using the device you could ask family and friends if they have any old tapes they want converted as well.
Maybe even charge them.

