It’s been a while since I focused on the Video8 / Hi8 camera models and to be honest the previous post is definitely biased with what capture card I prefer to use. This time I want to be more thorough and show different ways you can digitize video 8 tapes with a variety of brands.

While there are numerous capture devices that will work for Video 8 cameras, I won’t cover transferring Video 8 to DVD using a DVD/VCR combo. You can find a post here that covers that type of capture with VHS tapes as the results are the same.
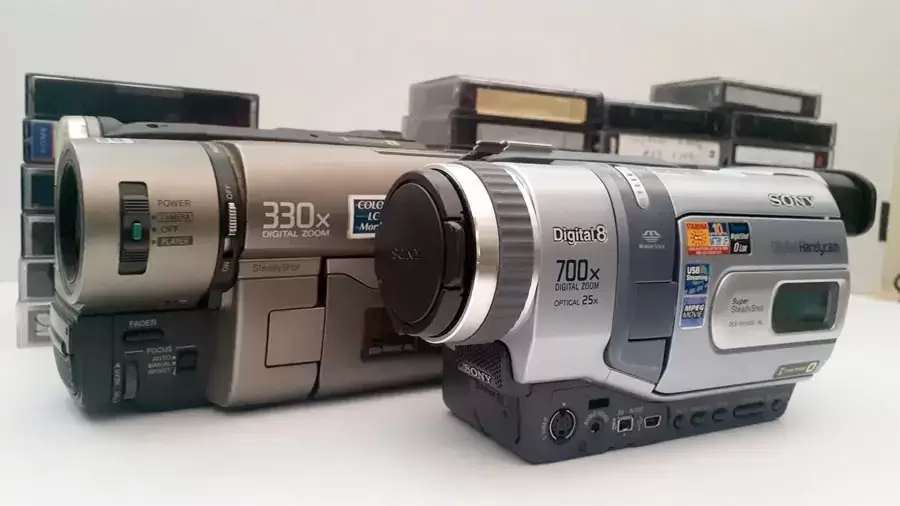
Video 8 Verses Digital 8 Connection Types
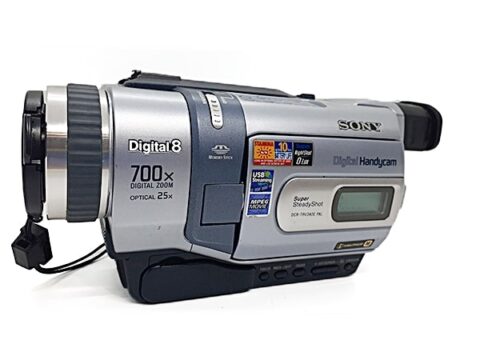
If you were to compare between the two cameras, Video8 and Hi8 both have a composite output connection. Some models will have stereo sound (both left and right audio).

From personal experience, most transfers I have done have been Hi8/Video8 tapes. Yes, there are cases where people specifically recorded their home videos using a Digital 8 camera, but I would also assume the same people would not have simply thrown out such a camera and still own one to be able to do the transfers.

This particular model only has a mono audio. Yellow connection is for video and the black is for mono sound.

Using the above example I use the white connection for the mono audio.

On the other hand we also have the Digital 8 Cameras which will have composite, S-Video out and FireWire. Which output you would use varies on the capture method.
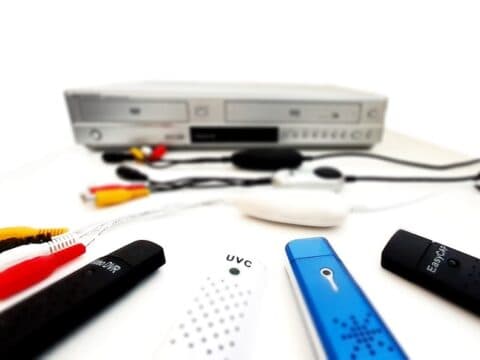
easyCAP
First on the list is the easyCAP USB stick. It can be hit or miss depending on your camera and the quality of the tape but on the plus side it is the cheapest method.
For under $20, you can have a capture stick and use the the VSDC editor to capture the Video 8 tapes. Using this method will certainly be the cheapest.

The easyCAP will be the same as the UVC capture sticks or the easiercap models, but basically the easyCAP is the better of the models that I prefer. Most PCs automatically install the drivers without an issue.
I have an article comparing 7 capture sticks to each other and the results.
Connection is just matching the composite cables yellow for video in my in this example white for the audio.

Once connected to the PC the easyCAP will install the driver, usually referred to as AV2USB by default.

The amazing VSDC free video editor is actually ideal for video capture using the easyCAP.
One downside that I would have to say, is that it only captures at the 25 frames per second for PAL regions or 30 frames per second for NTSC formats.

To record from the VSDC free video editor simply hit Start recording in the bottom right corner. When you finished recording click the same button again and it will stop recording. there’s a destination path news leads in the videos folder.
Diamond VC500
The Diamond VC500 is definitely leaps ahead of other standard USB capture sticks. It is almost identical to the AVerMedia EZMaker7 (both use the same PowerDirector editing software). Its design is well thought out as having a 1 meter USB cable for reaching between your computer and camera.

Connection with the diamond vc500 is a matter of matching the composite colors. Yellow for video, white for audio.

Before connecting to the PC, you will need to install the specific drivers that come with the Diamond VC500. Don’t skip this step.
The remaining installation will cover the video editing software.

The diamond VC500 comes packaged with PowerDirector 12. It’s old software but it’s still a great editor and it will capture any Video 8 tapes in an MPEG format. Later you will be able to edit the tapes and export to another digital format or direct to DVD.
VIDBOX
One device that has started to grow on me is the VIDBOX PC Suite. There is a version that works with Mac, which is basically the exact same box but with slightly different software.

The box is tiny yet powerful enough to capture analogue sources without any issues.

Connection is easy to follow where it actually even tells you step by step via the software which composite connection you should be using.

The software records in an MPEG format and it will let you convert into MP4 after the capture is complete. There is an export option to DVD as well.
It is a basic type software but that is its selling point. Simplicity with a click of a mouse button.
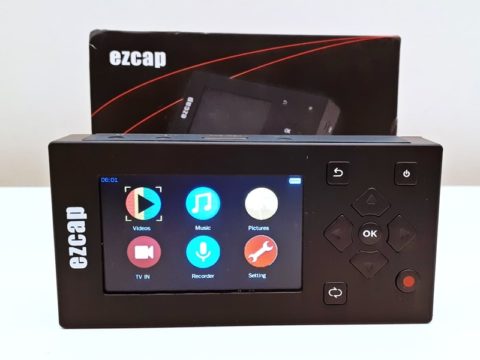
ClearClick Video2Digital 2.0
The Clearclick Video2Digital 2.0 will easily transfer your Video8 tapes without any issues. It is easily the best portable capture device with video quality recorded in an MP4 format at the full FPS from your camera.

Other benefits this device offers is the ability to record onto SD cards (do you still have any laying around?) as well as USB. The volume can be lowered or raised without affecting the recording.
At one stage I did have one peeve with the ClearClick device and that was regarding the power supply always needing to be connected. But the truth is, it is a capture device – not a multimedia player. If you want to play back the videos you’ve captured, watch them on the TV or computer.
Apart from that, this is a great device.

Connection is following yellow for video – white for audio.
PCIe 310B Composite Capture Card
Another option to convert Video 8 to digital is the use of an internal capture card. These cards connect directly to your PC’s motherboard and can capture at an extremely high bitrate. If you have a large amount of Video8 tapes to transfer, these cards can be a worthy purchase.

I have an article with a complete walkthrough of the AVerMedia CE310b which also covers installation of the card onto the motherboard.

Connection is easy by matching the composite colors. The above example shows the S-Video cable (blue) connected as well. For the video tests composite was only used.

AVerMedia supply their own software for the PCIe card. Personally I like it, there is a fair bit of flexibility for choices regarding capture quality from MP4, AVI, MPEG or even TS files.
Convert Video8 Tapes to Digital Using ADVC 55
Probably one of the more expensive options to transfer Video 8 to digital would be using a Canopus ADVC55 (or even an ADVC 100/110). The device itself can be hard to find online and it requires a FireWire card to import the tape footage.

The good news is that the FireWire card itself is extremely cheap for PCs. There’s an article here that covers installing a FireWire card on a Windows 10 operating system. Otherwise you can use the ADVC 55 with an older MacBook that has a FireWire port.

Connection via the composite ports is easy to follow with labels written along the ADVC 55.

The FireWire digital out is via a 6 pin cable. For this test, the cable was connected to my FireWire PC card which has a 6 pin input. Having a 6 pin to 6 pin FireWire cable allows the ADVC 55 to be powered by the PC and transfer video data at the same time.
Analogue Tapes Through a Digital8 Camcorder
Some Digital8 cameras can playback Video8/Hi8 tapes through their own FireWire port. They can definitely be another method to convert video 8 to digital. Purchasing a second hand Digital8 can be pricey but you do have better output options as in composite, S-Video and FireWire.

If you were to use an S-Video or composite output then you still obviously need a capture card to connect to. If you use the FireWire port, then you will need a FireWire card as mentioned earlier.

The FireWire port on the Digital8 cameras are 4 pin, which means they do not power the camera. You will still need to power the camera with electricity in order to transfer your video 8 to DVD (or digital).
There are 4 pin to 6 pin cables which are extremely cheap. My resource list shows the two varieties of cables regarding FireWire.

Capturing from FireWire to a PC can be done through most video editors. My own preference is from Magix.

Choosing the digital video setting (DV Camera) will allow you to operate the camera from the video editor.

Having a FireWire connection you can rewind or fast forward the tape simply by clicking on the action buttons under the recording monitor.
AVerMedia C875 HDMI Capture Device
One of the capture devices I still prefer to use is the AVerMedia C875. While this device is no longer made there is the Live Gamer Portable 2 plus available as the replacement. Personally I still prefer the older model as it comes with a component adapter as well as HDMI.
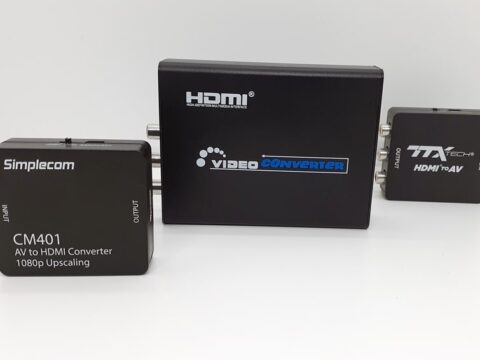
In order to transfer from composite connection into the C875 you will need a composite to HDMI converter. There a re plenty of varieties available. I even have an article called RCA to HDMI converters that covers the two I use.

If you have a DVD/VCR combo player that has HDMI out, you could connect the Video8 camera through the composite in then use the HDMI out to connect to the AVerMedia C875 as seen in the picture above.
This allows you to capture at the 60 fps (50 fps depending on your country region) that Video8 or Hi8 cameras record.
If you can only get access to their newer capture devices that only have HDMI input, then the above method could work without a hitch.
But never say never!

The AVerMedia recording software is called RECentral. The above picture displays RECentral 3, there is a newer version called RECentral 4, but this applies to their newer capture devices.+
Conclusion
There are multiple ways to transfer Video 8 to digital and all of the methods discussed in this article will work absolutely fine. Keeping in mind some videos may be more important than others (Xmas unwrapping presents verses a wedding) so you may feel a cheaper capture method is adequate.
The two methods that stand out to me are the ClearClick Video2Digital 2.0 or using a HDMI capture like the AVerMedia C875. They both capture at the full FPS which is exactly how the original Video8 tape was recorded back in the day.
Yes you could re-render captured footage from an easyCAP stick through free software (and have it done exceptionally well) but let’s be honest, if you have a box of fifty 90 minute tapes of your family over the years, you will want to transfer those tapes in the easiest and quickest method possible.