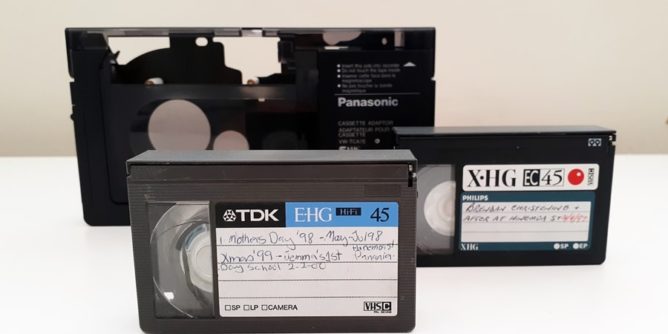
VHS-C cassettes can – from time to time – be prone to breaking.
I will be honest, when a customer points out that some of their cassettes may be broken, I do have a slight cringe moment inside.
When compared to Video 8 cassettes or Mini DV cassettes VHS-C always seem to be a pain to take apart. They have small parts that can fall out way too easily.

That being said, if you have precious memories on a broken VHS-C tape (and let’s be honest they’re all precious) it is definitely worth fixing the tape.
The method will be on the assumption you will be transferring the tape to digital or DVD and you won’t need the cassette afterwards and will show you two tapes that have snapped and how I would fix them.
I have another post that talks about simply swapping the tape from another case which could apply here as well if the tape is not snapped and just a problem with the case.

Tools that you will need is a small phillips head screwdriver. Make sure it has a handle as apposed to just metal because the screws will be tight.
I do recommend a small flat head screwdriver as well to pry open the cassette and a pair of scissors.
Step One
Screw placements can be different from various manufacturers but what you are looking for are three to four areas where the screws are placed.

In the photo above there are only three holes running along the top.

Using the phillips head screwdriver twist the screws anti clockwise. Do this with all the screws.
Hold the cassette securely and turn it over as you tip out the screws.
Step Two
Don’t do what I did the first time pulling one of these apart, thinking the top will just come off. I ended up using force just to see the cassette innards fly in every direction.

Along the back of the spine are two hinges.

Use the flat head screwdriver and gently push those hinges in. This will allow the cassette to separate easily.

Continue to pry along the sides gently as there are springs and guide rollers that can pop out easily.

One place that can stop you from opening the cassette is directly under the release button.
This pyramid looking button when pressed will let you open the front flap.
For some reason this area will get stuck and need a gentle pry to lift the whole cassette top off.
Step Three

Once the cassette is open you will be able to slide the tape reels out.

Again, it is advisable to watch how you slide the reels out. The little white guides will pop out as you lift up the reel.

Keeping the lower cassette portion in tact will save you a headache later trying to find which spring goes where.
Worse case scenario, you could open a second cassette and see how the pieces go back together.
Step Four
So in this example – the tape is deteriorating and flaking apart in my hands.


I can only guess that this tape maybe jammed severely at one point and the customers were able to get the cassette rewound (but broken).
The fragility of the tape means I won’t play this VHS-C cassette longer than the first twenty minutes.

I will cut away the torn pieces.

And use cellophane tape cut to width of the VHS-C tape.

As stated earlier I have no intention of playing this cassette all the way through. I need the cassette to be intact in order to play at least the first twenty minutes.
I could place cellophane tape on the under side of the cassette, if I was playing it all the way through, but I don’t trust if the cassette will snap at another location.

Step Five
Once the cassette has been trimmed and taped, it’s time to place the reels back.

I usually begin by pacing the side that has more cassette tape in first.
Having the heavier side go in first makes the remaining tasks easier (for me at least).
Make sure to place the tape around the shoulder guides as shown in the above picture.

Along the left hand side, make sure the tape is around the shoulder roller.

A front view shows how the tape looks when tightened by turning the reels.

Place the top back on and check that there is no gaps showing.

Finally replace the screws and tighten them in.
Repairing a Second Cassette
Taking a look at a different problem that commonly occurs with VHS-C tapes – when a tape is rewound to the start and simply snaps at the reel.

Locate the screws that need to be opened.

The above cassette is easy to open. There are some (like JVC brands) that make the screw heads so ridiculously small. So do have some patience if you encounter troubles trying to unscrew them.
Second Cassette – Step One
The same steps will apply as written earlier when taking the front cover off the cassette.

Having the cover off, we can assess how the tape has snapped.

All of the tape is safe on the main reel. It will be just a matter of splicing the clear take up slack onto the the other reel.

Checking the other side shows no rollers or pieces have gone astray.
Notice on the right hand side a piece of clear plastic?
Some brands of VHS-C tapes have this, others don’t. It’s like a dust protector and can slip out very easily.
Second Cassette – Step Two

Gently take out the reels, avoiding to slip out any plastic pieces along the way.

Next we are going to simply tape the take up slack onto the reel.
One thing to point out is to remember the direction the tape will be going. In other words, tape it together knowing the white cog section will be along the bottom of the cassette.
Second Cassette – Step Three

Having the the reels taped back together, it’s time to place the reels back into the cassette case.

Starting with the heavier side first, thread the tape through the roller guides in an under/over fashion.
The shoulder roller will have the tape going on the outside.

The clear plastic dust protector can cause issues at this point.
If you don’t have a steady hand, you can gently hold this with your finger tip as you thread the remaining tape around the guide rollers.
It’s not a problem if it drops out just fiddly to put back in place.

The above picture shows how the tape should look between the rollers.

Finally you will be able to replace the white reel into its slot.
You may have to twist the white reel clockwise so the teeth slip properly into place.
Lastly replace the front cover of the cassette and fasten in the screws.