If you have an older Sony Handycam model that records videos onto a hard drive then this article will help you transfer that footage over onto a computer.
Some brands of camcorders have given up for software support for older models, but it’s great to see that Sony still has a piece of software that recognizes all their older models.
Advantages & Disadvantages
These type of cameras (this example is dated back to 2009) can eventually have hard drive failure, or just not boot up.
I’ve only encountered two models that had issues and had to try and retrieve the data, it just shows that none of these devices are impervious to finally failing.
That and dying from gravity. Or sand. Or water.
Anyway you get my drift.
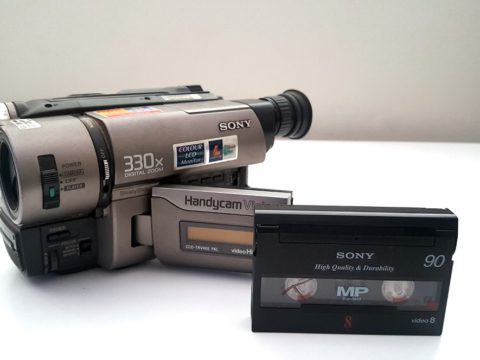
The advantage older models have is that the cassettes can be separated from the broken camera.
The advantage these style of camcorders (and newer 4K models) is the large capacity of storage for photos and videos all saved on hard drive.
Something to remember with these larger capacity cameras is that even if you want to burn footage to a DVD you can only do 4.5GB at a time.
For example – using the picture above, if you completely used the 80GB on this camera for a holiday, that’s about 17 DVDs to burn!
More than likely you are going to really just back the footage up onto another hard drive. I recommended a portable hard drive for any backups of photos and especially videos.
Option One – Connecting the AV Cables
Let’s get the obvious method out of the way.
Yes you can transfer each clip individually via the composite cables. The Sony Handycam will play out the clips similar to this camcorder post I wrote a while back.
Be aware, if you don’t have the AV composite cables, Sony have their own propriety cable they use for these type of camcorders.
Luckily they use the same type of connection for their DVD Recorder models as well, so you might be able to find one as second hand on eBay.
If you are going this route, may I suggest reading this post to give you an idea of the numerous capture devices that will work to get a copy of the clips.
Another thing to note is that if you capture using an AV cable from these type of camcorders, you will capture all those menu options that appear on screen as well.
Option Two – Connection via USB
I know this should have been option one but I needed to cover both ways to transfer your footage.
By far the superior way will be to simply connect the Handycam to a PC via a mini USB.
The USB will be a mini USB adapter.
If you have the original cable supplied, make sure to use that. Using a faulty or lower quality cable will result in no driver installing onto the computer.
Yours truly found this out the long way.
With the cable connected, the PC will proceed to install the drivers so your PC can see it as an external hard drive.
This will definitely take a moment to install depending on the computer.
Another thing that’s worth mentioning is the option to burn discs which Sony called One Touch Disc Burn (pictured as the arrow disc).
Apart from sounding like an STD, this option would allow to burn directly to DVDs. The caveat is you need to download the PlayMemories software.
Why is this a caveat? In my opinion you’re better off transferring the clips off the camcorder first, then deciding which ones you may want to burn on the PC using a video editor.

Once the USB driver is installed on the computer you will have three options available. USB CONNECT, USB CONNECT (MEMORY CARD) and DISC BURN.
The difference between the top two is the memory card will transfer photos only.
Downloading and Installing PlayMemories
First up if you want to use the official Sony software to transfer the videos then download PlayMemories to get you started. The software is dedicated to their camcorders and cameras.
If you are using a Mac, the link can be found here to download.
The zip file is free to download and is 174MB (at time of writing) in size.
Once you have extracted the file, PlayMemories will proceed to install the software. Follow the install steps and click next.
The installer can take some time to finish.
PlayMemories Home
The software will open automatically and proceed to show the videos/photos that are on the Handycam.
Each image can be played to see what the clips are.
Under Tools – Import Media Files you can copy the whole camcorder files to your computer.
With the above example the customer had 1147 files they wanted to back up.
I’m not going to lie, this does take a while to copy over. Make sure you have the space on your PC to copy any video files.
If you were going to simply copy the video files directly from the camera like an external hard drive, the files are going to be jumbled together.
Where as the PlayMemories software creates separate folders for each day/month the camera recorded the videos thus making it easier to search for a particular moment.
In this case the customer was looking for a 21st birthday under a certain date.
Do Smart TVs Play MPEG Videos?
As much as I would like to say a resounding yes, turns out not all TVs will.
This video shows that a lot of people seem to have issues with file codecs not working on smart TVs.

I have an older cheaper model and as you can see in the image above I can play the mpg file without a problem.
The customer’s TV wouldn’t recognize the videos when simply copied from the Handycam. Luckily the PlayMemories software has an outstanding MP4 converting software in built.

Along the right hand side are the tools icons. The icon you want is called the Edit/Convert Videos.
Inside this little section, you will be able to edit individual clips or combine several clips.
But what we are want is the Convert to MP4 and Save.

You will be able to drag clips into the side bar as many as you want at a time.

There are three options from extremely great quality to smaller easier to upload files.

Rendering in highest quality will take a little time, again depending on your PC. My computer is getting a little old, but does seem to render quite fast at approx 5 minutes.
Are There Other MP4 Converters?
So if for some reason you didn’t want to use the Sony PlayMemories software, are there other options available to convert.
Yes there sure are.
The most popular free version is HandBrake, which will convert any file. Because it has so many options to tweek, people can become a little confused how to use it.
This video thoroughly explains the presets to choose when converting to MP4.
There are of course paid options as well. While they may say that certain elements are free, to get the best results require you to purchase the full versions.

Any Video Converter has a freeware version alongside an Ultimate version.
The layout of the software is easy to use but I was a little disappointed by the free version’s export quality.

Another converter is Freemake which will allow you to convert videos but with their watermark on the clip. You can pay $1 to use all the features for one week.

One of the most popular brands is DVDFab.
This company does convert videos really well but they are definitely pricey. Their software layout is easily the best of the three examples.
They have created a dedicated enlarger AI to enhance video quality which claims to improve the old VHS videos and upscale them without losing quality.
PlayMemories Results
When comparing the original files to the converted MP4 files, PlayMemories does an excellent job.
If you own an older Sony Handycam using the PlayMemories is hands down the best option to transfer to MP4.

Original MPG file was just under 24MB with a bitrate of 9500kbps.

When up scaled to 1920×1080 the MP4 file became 84MB with a bitrate of 24000kbps.
Impressive.
Now this customer had 1147 videos, some longer than others all needing to be converted to a video format her TV could read. That’s over 100 gigabytes of video!
Which brings us to backing up the files onto a portable hard drive that will last you a long time.
Whether it be SD cards, mobile phones or even older hard drives from other computers, you should always back up those memories onto a physical media before you assume that they are safe.