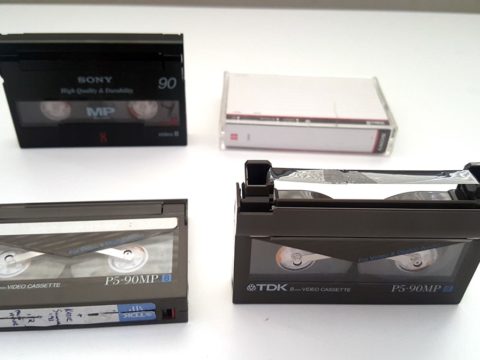
I recently had a customer who wanted to capture still images from video (specifically his parents wedding DVD) and as it turned out he didn’t have the original images anymore. He had no idea if it was possible or how to go about getting the images into a physical form.
So initially I tried to explain the concept of downloading a free media player then taking screen shots as it played on the computer.
His reply was he wasn’t tech savvy.
No worries. Needless to say I did do the service, but I thought I want to show you how to do this process quite easily.
And it is easy.
Download VLC Player
It’s time for you to have a player in your life!
If you visit the videolan website, you will be able to download the free VLC player. This multimedia player is available for every OS format out there (unless you’re running an old Nokia 6600!)
The process is extremely easy and doesn’t contain any spyware at all. Every time I install a new OS onto a computer one of the very first things I’ll download is VLC player.
It’s easy, simple and gets the job done for playing every possible format including music CDs and DVD discs as well.
During installation you may be prompted if you want VLC player to be the favored media player – I simply say yes to that question.
Capturing the Still Images
Once you have the installation out of the way, it’s time to find the shortcut for capturing still images.

You can open the video by either double left clicking the file or right click and select Play.
Hitting the Spacebar will pause/play the video.

To find the preferences settings, simply click on the tools along the top menu and select Preferences at the very bottom.

The Preferences Window will allow you to change a variety of settings but if you were simply trying to find the short cut to taking still images click onto the last icon called Hotkeys.
A new window will open up showing all the shortcuts that can be altered or changed to your preference.
Typing snapshot in the search bar will instantly bring up the appropriate shortcut.

You can also scroll through the shortcuts until you find the Take video snapshot appears.
The shortcut is shift+s. You could change this option to whatever you would prefer, but keep it the way it is.

Under the Video Settings Icon, there are more settings regarding still shots that can be altered:
Directory – Let’s you change the location to where the images will be kept. By default it is kept in the Pictures folder.
Prefix – You can change the name of the captured photos and have them with sequential numbering.
Format – By default the photo format is set to a PNG file. There are three options which are jpg, png and tiff.
I’ve found the jpg quality too low for my liking and obviously tiff can get too large as I’ve mentioned in this article.
So it is a bit of a Goldilocks and the Three Bears scenario where the PNG format is just right.

With the knowledge of which short cut keys to use, we’re now ready to let the video play and capture any images as the video plays.
Tapping Shift+s at the same time will keep a screen grabbed image in the designated folder.

The above example is a collection of 101 photos from this particular slideshow.
Now in my case I didn’t change the prefix before hand so I’m left with a messy worded file name. That can be changed by selecting all the images (Ctrl+a) and then right click and choosing rename in the windows options.

I simply changed the file name to image and windows automatically assigned the sequenced numbering.
How To Convert Your Photos into a Different Format For Free
So if you have a collection of photos saved in a format you don’t prefer, you could either play the video again with the video settings changed to the correct file format you want.
Or you can visit another site in the VHS Converters family called convert your photos.

I created this site as a one stop shop for anyone who wants to quickly convert photos into other formats for free.

An interesting thing I noticed with online free image converters is the limit of images you can upload. That’s not the case here, I uploaded all 101 images (that are approximately 2mb each) and there is no limit of the quantity allowed.
Ok, so I haven’t tried 1000 images at once, so there may be a limit.

Converting does take between two to five minutes. If you’re doing only a few images at a given time then the process is almost instant.

Download will automatically start once the conversion is finished. If you’re converting individual images then it won’t appear in a zip folder. It will just be the new file.
I will have the name of the zip folder changed. I mean it could be worse, it could’ve have said I love convicts.

If you are changing quite a few images then they will be in a zip folder which you can then open and extract to your desired folder.
How to Compress Your Images For Free
As I mentioned earlier, I wanted to create a one stop shop in the case of when I am needing to compress images (for the VHS Converters site) or other client requests.
I use to visit random sites that – while were functional and great – always had limits to how many photos you can upload or compress.
Then there’s the case of trying to remember the site’s name (if I’m on a different computer). Anyway, now I just visit convertyourphotos.com and I know it can be done.
The same reasoning applies to photogenicmoments.com another site part of the VHS Converters brand that allows for quick simple online editing, I don’t want to keep Googling free online editor then forget the name of site five minutes later.

If you wish to compress images using the site, that can be easily achieved by selecting Compress Image along the left hand side bar.
This will change the main screen to the Compress Image set up.
Click on the blue button to open your computer’s folder and simply select the photos you want to compress.

The above example I’ve only uploaded one image, you could compress a much larger quantity but be aware it can take up to five minutes the more images you upload.

Comparing the compressed image size to the original file we have 2.11mb (original) compressed to 126kb (new).
Conclusion
If you find you have home videos already converted to digital of people or events where there are no actual photos from that time, just know that it can be done using VLC player and this applies to DVDs as well.
While the quality of still shots may vary based on the original quality source, sometimes capturing something is better than no memory at all.
That’s just my opinion.