There was a time when I promised myself to buy a Mac (of some sort) to test video transfers and see what the results are.
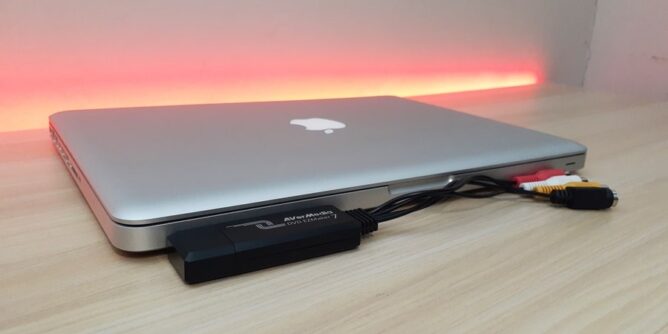
Today is that day, so in this article I’ll test the AVerMedia DVD EZMaker 7 for Mac and show what the results are like.
But I’ll mention first there’s definitely a caveat.
And a crappy one at that.
Why is There Always a Caveat?
The caveat is: AVerMedia DVD EZMaker 7 only works up to MacOS Sierra 10.12. The test I performed was running on El Captain.
So if you’re already updated to a later OS, this will not work (weirdly, even in OBS Studio it won’t work on later OS updates).
Shame really, because the software and test were pretty good.

In my original article I mentioned the easy installation for Windows based computers and the simple but useable version of PowerDirector 10 to capture the video footage made the device a great buy.
Do I still think the device is great buy with it connected to a Mac laptop? Yes, but only if you happen to own an older Mac that hasn’t been updated from Sierra onwards.

I think that’s going to be the case with a-lot of these USB capture devices set up running for Mac. Some will be hit and miss.
That’s just my opinion.
That being said, in the off chance you bought a second hand MacBook and it hasn’t been updated then maybe the AVerMedia DVD EZMaker 7 could be the solution for transferring your old videos.
Installation For AVerStudio
Poor Mac users sure get a raw deal when it comes to a software install. There simply isn’t any software or driver on the disc supplied. Instead you will need to visit the AVerMedia Product Site and download the driver manually.
Because they do not offer support for any OS higher than 10.12 they do have a slightly humorous line that reads: We are Apologize to cause your inconvenience, and thank you for understanding!
Once you have downloaded the zip folder, simply extract the file and drag it across to Applications.
From there the software will install.

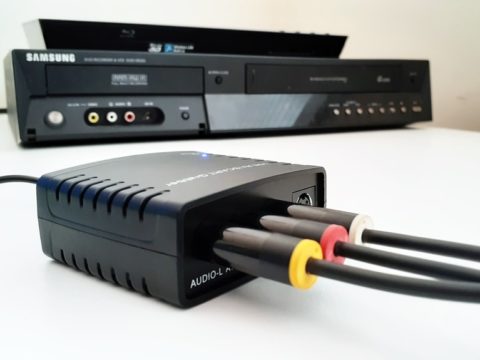
At this point connect the EZMaker 7 to your VCR and into the USB port of your laptop.
AVerStudio For Mac
I wasn’t quite sure what to expect using the software, in fact, I wasn’t quite sure where to find the software!

The install is only 9MB so my faith in what potential the capture software could do did start to dwindle.

The Source Tab gives the options to capture via composite connections, S-Video or even open a file from a designated location.

For my test, I was using the composite cables. Hitting play on the VCR instantly displayed the video image in the source monitor.
And I do have to say the picture quality was better than I anticipated. It was definitely running smooth but certainly not the full FPS it should be.
Clicking Next brings you to the Capture Tab.

The Capture Tab doesn’t really allow for much options except for viewing fullscreen, editing the color gamut (only slightly) or setting the recording duration.
I’ll never get these companies and their recording duration obsessions!
Along the bottom is the sound levels, which cannot be changed.
Finally, how much remaining hard drive space you have left for recording

To start recording simply select the big red button.

Once finished, tapping the red button will stop the recording. Along the right hand side you will see the recorded length.
At this point you will be able to select the Next button.
AVerStudio Clip Editing & Exporting
The Clip Tab is a basic editor that allows you to cut out segments and join the remaining clips into one continuous footage.

The editor reminds me of the ArcSoft ShowBiz software
Along the bottom there is the timeline of the captured clip. To cut out unwanted segments from the clip you would simply use the green guides (from left and right) and bring them to the designated area you want trimmed out.
The right hand side you have the edit options: join, redo, undo, cut and playback. Not really much to go with.

Speaking of not much to go with, the export options do not offer anything other than an M4V file. The size of the file cannot be changed as there are no options other than M4V for an apple product.

Reminds me of the old SNL John Belushi Cheeseburger sketch.
An export option for MP4 would have been nice, just saying.

You will be able to change the filename and where the file can be exported to. Once done, click on the export button.
The wait time for the export was approximately ten minutes.
Results
While the quality of the exported file looked good and the video wasn’t washed out or over saturated, the problem I did have was with the FPS.

The M4V file is 24FPS while the actual video is 50FPS. I personally don’t get why companies choose this frame rate? NTSC format is either 60FPS or 30FPS, PAL regions are 50 and 25FPS, but no AVerMedia export this into 24FPS.

For the half hour test the file size was 871MB with a bitrate 3786kbps.
As I said earlier, the quality is fine, certainly better than other USB capture devices I’ve tested.
Conclusion
The DVD EZMaker 7 is compatible with OBS Studio, but only an older version that worked with the Sierra OS. If you have an updated Mac computer/laptop and are running a newer OS (Catalina in my case), then it won’t work.
Why? Who knows? The irony being my whole gripe about the frames per second issue would be eliminated in OBS Studio because you have more options to change in the settings.
Overall I do like AVerMedia DVD EZMaker 7 but it is really catered for the PC user. There’s way more compatibility generosity for various PC operating systems.
If, and I mean if, you are still running El Captain or Sierra on your Mac and you can get past the 24FPS export only option, then yeah this is an option to go for. But it’s not your only option out there.
Otherwise, I wouldn’t use this for home video transfers on a Mac.