Using a USB capture device to capture home videos can feel like a discouraging act. I’m going through these easy CAP type sticks and getting mixed results. Today it’s time to check the Video DVR for Mac and see how well it plays.
These USB sticks are certainly amongst the cheapest capture devices you can find, Banggood has them here. Amazon has them listed as well.
No products found.
In the article 7 Videos Capture Devices tested on Windows 10, I had a negative result where I couldn’t get past a certain image size with that test.
It doesn’t happen here when using the Video DVR for Mac (but only through using OBS Studio).
Don’t get me wrong, it’s a good thing, but some uniformity would be great with these results.
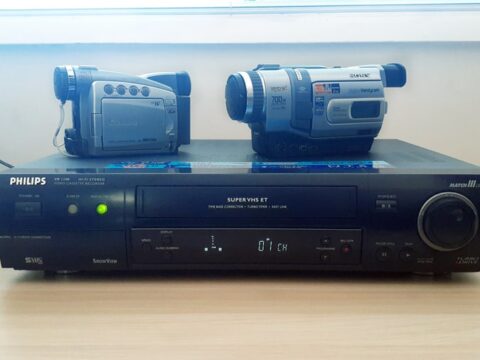
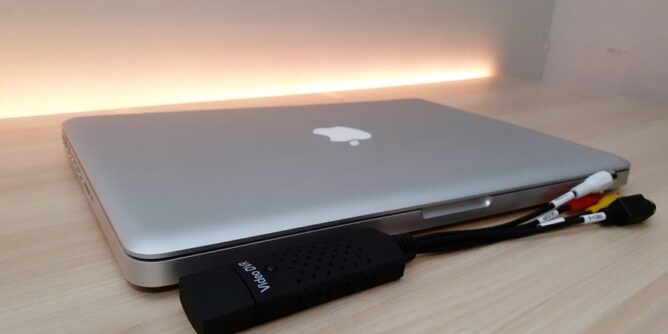
Video DVR Connection
So far with these Mac tests, when using USB cheap capture sticks, I’ve never had to search for drivers. They would simply plug in and the driver would be assigned almost instantly.

That being said, there are a number of devices I have that simply won’t work on the Mac OS but fortunately the Video DVR is one that does work.

Connection with the composite cables is recommended to do prior to placing the DVR into the laptop. Yellow for video, Red/White for audio. The tests were performed only on composite cables.

One thing regarding these type of devices is the fact you cannot use another USB port next to it. Not a big issue, but definitely an annoyance.
Video DVR Quality Through QuickTime
As it turns out, I failed to mention about about transferring VHS videos to digital in this post using QuickTime, so yeah, that’s on me.

The capture test I made using QuickTime – was done after I had reinstalled Sierra on the laptop. Not that it should matter, but just letting you know.
So assuming you have connected the Video DVR into your Mac’s USB port, then the steps to capture through QuickTime are quite easy.

Open up QuickTime through the Applications Folder.
Once it has loaded – select New Movie Recording.

A Movie Recording window will open waiting to find a source. It may also open the web camera (as in my case) but don’t fret.
Select the (oh, so obvious) drop down arrow next to the record button.

This will give you the option to select which video source you wish to record from. In this case it’s the USB2.0 PC CAMERA driver. The same has to be chosen for the audio otherwise you will have no sound.
The Quality setting can changed from High to Maximum and there is certainly a difference between the two regarding bitrate, but that’s about it.
Something else that is apparently missing is the option to change FPS (frames per second) or whether your importing from NTSC or PAL. You can see the results at the end of the article.

Recording the screen is a matter of clicking the red record button. Clicking the same button will stop the recording.

When it comes to saving the finished file, simply select File at the very top of the screen, then select Save.
A new window will open allowing you to select the name and location of the file.

The video will save in your selected folder or location. Depending on the file size, it may take a few minutes.
And that’s it for recording using QuickTime.
Video DVR Set Up With OBS Studio
OBS Studio is my go to recording software for these type of devices. But if you are using Sierra OS be aware that the latest version of OBS Studio will not run. You will need the earlier version 24.0.2 that can be found here.
Installing is a simple case of dragging the download into the Application folder and waiting for it to install.

You will need to have the Video DVR plugged into the USB port before you commence adding the Source details. I usually have the VCR playing as well just to get an idea of the picture settings.

Under the Sources tab in the lower left corner, simply click on the ‘+’.

When the new window opens – choose the Video Capture Device as the source.

A new window will open allowing to give the capture device a name. This device name will stay in the Source tab even after you close OBS Studio. Or unless you delete it.

The cog wheel will open the properties of the Video DVR. Within this window you must select the USB2.0 PC CAMERA driver.
The Preset is the maximum size the computer can record at. For my laptop, 1280×720 is the recommendation. You may have a better computer or laptop that will give you the option for a larger Preset size.

With the correct driver chosen, the video should instantly appear (if you have the VCR on play already).

Under the Preset drop down window, the options to select High or the maximum screen resolution – in the above example 1280×720 is the maximum size.
When you are happy with size setting and select OK.

You can drag the video by the corners to make it larger for the canvas.

You could stretch the video over the whole canvas thus cheating and making the video appear to be 1280×720 but you will lose a portion along the top or the bottom, depending how you move the video along the canvas.

Before you commence recording any video, you will need to change the video settings. There is a Settings option along the right hand side.
For me this tape needed to be set at 50FPS.

The Audio Settings need to be changed as well. Making sure the USB2.0 driver is selected under the Mic/Auxiliary.
Selecting OK will bring you back to the home screen.

From here you can click on the Start Recording button along the right hand side.

You won’t hear any sound, but the volume levels will indicate the sound is being recorded.
Video DVR Results
The test YouTube video below has actually three samples.
The first sample is a clip from the Catalina capture, ironically as the clip is of boats, chugged at 20FPS or less. In short – the Video DVR on Catalina OS is crap.
But on Sierra OS, things are much better.
The side by side clips (start at the 30 second mark) are from QuickTime and OBS Studio. QuickTime only allows you to record at 640×480 size, which I thought was really weird. The larger OBS Studio sample is at 720×576.

QuickTime allows for two quality settings but neither will change the video size above 640×480 at 24FPS.
The Maximum Settings has the bitrate at a whopping 21000kbps which I might add is overkill for that video size. A four minute clip is already at 618MB which makes a one hour video average out at approximately 9GB.

The High Settings comes in at 3500kbps and still at 24FPS. By the way this is the video used in the YouTube sample.

OBS Studio has a bitrate of 10287kbps (which is a good average). I also prefer being able to set the frame rate to the correct setting.
Conclusion
If you are transferring home videos and are using a Mac computer then you will need to be running on an older version of Sierra or High Sierra to have a smooth transfer process. The main benefit being you can copy the tape through a USB port. Recording through QuickTime is there if you don’t mind the frame rate issue. The choice of using OBS Studio is the better option in my opinion.
As far as quality goes, when using the Video DVR to Mac I’d say it’s average at best. It is a cheap USB stick so the quality will never excel compared to other options out there. If the videos you wanted to transfer were not that important then the result is definitely acceptable.