Corel VideoStudio Pro is a consumer friendly video editor that will allow you to edit sophisticated clips and burn them to DVD or export to any format you desire.
There are two versions of this software, VideoStudio Pro and VideoStudio Ultimate.
This review will only cover the Pro version as this is satisfactory for importing, editing and creating a DVD. It boils down to personal preference.

VideoStudio Pro has along the top three sections that Corel call workspaces. They are CAPTURE, EDIT and SHARE.
![Corel VideoStudio Pro 2020 | Video Editing Suite [PC Disc][OLD VERSION]](https://m.media-amazon.com/images/I/51TKuCkH7pL._SL160_.jpg)
- Transform your photos and videos into movies with this easy, fun, creative video editor
- Get started quickly with slideshow templates and smart movie tools using drag-and-drop titles, transitions and overlays
Last update on 2024-05-11 / Affiliate links / Images from Amazon Product Advertising API
This review I’m going to do things a little different. I’m going to start with the EDIT workspace as that will be the main area that you will be working in followed by the SHARE workspace then finally the CAPTURE workspace.
It’ll make sense in the end. The PC I use is relatively old i7-4770 running Windows 8.1.
Navigation Options

By dragging a clip onto the timeline, the preview window will show that clip. Tapping on the spacebar will start and stop the clip.

If we zoom in closer under the preview window we have these navigation options:
- Project – clicking on this option will allow you to play through the whole video project.
- Clip – if you only want to watch or edit just the clip highlighted.
- PLAY – to play the video project, tapping it again will stop the video.
- HOME – this brings the scrubber back to the very start of the project/clip.
- REWIND – allows you to move back frame by frame.
- FORWARD – allows you to move forward frame by frame.
- END – moves the scrubber line to the very end of the project/clip.
- LOOP – plays the video continuously.

- HD – allows you to watch the clips in high definition. Also has an option for 360 degree video (personally for home videos, I have yet to be asked to make that!)
- MASTER VOLUME – This controls the computer volume.

- ASPECT RATIO – allow you to change the video dimensions. Most old clips from VHS tapes would be in 4:3 format.

- SCALE – allows you to enlarge and stretch out the clip with pointers in each corner.
- CROP – will zoom into an area of your choosing. Like cropping a photo.

- MARKERS – these mark an IN and OUT on a clip that allows you to just play a small segment. Also handy for precise editing.
- SPLIT – tool used to cut a clip in half. Definitely worth remembering the shortcut letter for this tool.
- FULL SCREEN – allows you to adjust the preview monitor to full screen or not.
The Library Panel
The section marked in yellow below is referred to by VideoStudio Pro as the library panel.

This is where you can keep videos, photos and music into one area for easy selecting.

If we look at the button options along the top they are:
- ADD FILES – this will open a folder that you just need to point at where your files are. You can also just drag files directly into the library panel and they will stay there.
- HIDE VIDEOS, PHOTOS or MUSIC – this comes in handy if you had a lot of different media in the library. By clicking each icon, you are in effect hiding those type of files.
- SEARCH – if you know the name of the file, you can always just type it in.

Further along the remaining options are how you prefer to view the library files:
- THUMBNAIL – with or without file name attached.
- LIST VIEW – showing all details about the files.
- ALPHABETICAL LISTING – whether you want the files listed from A-Z.
The last slider will show the library panel larger or smaller by sliding left or right.


An interesting thing worth mentioning, when I added files to the library I noticed that the test folder should have had more videos inside.

I opened the same folder via the computer separately to check side by side and sure enough there were two more videos.
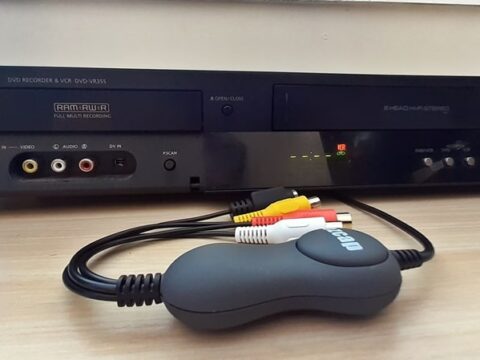
One file was a .3GP extension and the other a ripped VOB video file. Ripped from a sample mini DVD in this post Panasonic DVD Camcorder To Digital.
While people may argue that a .3GP phone file is old, those files could still be transferred onto a DVD or at least added into one large MP4 file. But it’s not accepted at all.
Just seems like a strange decision.
The VOB file cannot be copied across but if I open it under the CAPTURE work space, then it will read it into an MPG format (which you will see later in this post).
Looking at the Options Panel – Folders & Music

The options panel sits next to the library panel. at the very top there is an ADD button which allows you to create a new folder specific to your needs, For example, you may want to create a folder just for music, then another folder just for photos.
You’re not limited to only placing everything into just the library area.

Corel VideoStudio Pro has a large list of 30 second generic pieces of background music. Depending on the video you are making (especially if it was an old wedding being transferred to DVD) I don’t think the music will be of interest to you.

If you wanted to use commercial music there is an option to buy a license for individual songs.

They are pricey and I’m guessing that if you were to upload a home video to YouTube (even with buying a license) you’d be hit with a copyright strike.
Looking at the Options Panel – Effects
Further in the options panel we have:

SPLIT SCREEN TEMPLATES – Allows you to add multiple videos on the one template. Using VideoStudio’s built in templates will make it easier to create a simple but dynamic video.

TRANSITIONS – A staggering amount of cross fades between scenes.

TITLE EDITOR – You can add titles to the start of your video. VideoStudio Pro also lets you add subtitles.

There is an option to change any attributes to the titles such as font style,size, color, alignment etc.

OBJECT – VideoStudio Pro will allow you to overlay images such as .png files with transparency. An example of using such feature could be having an image that stays in the foreground while the video plays in the background.

FX – Under the FX button are over sixty filters that can be dragged onto a video clip. A maximum of five filters can be used on any clip.
Again if you were just using the editor for trimming video clips, some of the filters would not be used. Anti shake does come in handy though.

PATHS – While the last option doesn’t say what it is called, it refers to tracking paths.
This allows you to pin point a certain item on your clip and make a tracking path following that item throughout the clip.
There are set paths that have been created or you can custom create a path.
The only times that I could see something of use for that (again in home video transfer sense I’m referring to) would be if you wanted to do a birthday tribute and had the titles follow the birthday person.
The Timeline Tools

The timeline tools give you quick access laying above the timeline itself. By highlighting a clip then clicking on any of the tools will open new options to change the chosen clip.
By clicking on the tools icon you can decide what tools you want shown above the timeline.
Those tools are:
- RECORD – This will allow you record or capture a new clip and add it into the current project.
- SOUND MIXER – Adjust the volume of individual tracks.
- AUTO MUSIC – Opens a new option to add music tracks.
- TRACK MOTION – Same as the path creator tool. Let’s you track and make a path following an item in your clip.
- PAN and ZOOM – Gives the option to zoom into a clip and pan left to right. I might add this really only works well when the original clip is high resolution.
- SPLIT SCREEN TEMPLATE – same as earlier. Opens the split screen templates.
- SUB TITLE EDITOR – allows you to add titles and subtitles.
- MULTI CAMERA EDITOR – ideal if you have different angles of the same footage. Doesn’t come in handy with just one clip at a time that can be set on the one timeline.
- TIME REMAPPING – Allows you to slow down the speed of the clip or speed it up. Rewind it, make it go backwards.
- MASK CREATOR – Ideal for green screen effects.
- 3D TITLE EDITOR – If you prefer to create a 3D styled title intro.
- SLIP – When clicked this will keep the highlighted track from moving.

At any time if you right click on a track, more options will be at your disposal.
Some of those include copying the file, rotating it, fading in or out and many more.
Sharing Options
Under the SHARE workspace there are options to render your final video.


VideoStudio Pro will export to popular formats also allowing you to tweak the properties before rendering.

I have to admit rendering to a mobile device or a console does seem to be dated. Considering that you can practically copy to any device anyway and most if not all will play MP4 files.

Third on the list are the usual online candidates for video sharing. Adding Facebook should be a must as well.

Next are the disc variety export options. Further down the post I test out the DVD transfer burning.

Lastly we have 3D export rendering options. Can’t say I know about rendering into 3D and just haven’t seen any reason to.
Could you imagine handing a client a wedding DVD and saying “Oh by the way I rendered your wedding video into 3D. So you can pretend you were there … again.”
Burning a DVD with Corel VideoStudio Pro

I wanted to test out the DVD burning option to see the process.

By clicking on Auto Add Chapters VideoStudio Pro will detect where it thinks chapters should be inserted.
Options to remove them one by one or all makes it convenient if any mistakes are made.

Along the bottom there is the Project Settings icon. Clicking on that will open a new window properties tab.

The settings (shown on the right side) allow you to customize the mpeg settings.
NTSC or PAL formats can be chosen here as well.

When happy with all the settings, clicking next will bring on the MENU EDIT.

VideoStudio Pro gives three basic templates for the MENU. You can add your own background, add more Text or more images.
Along the bottom there is a preview option to show what the menu will play out like.

Output option allows you to label the DVD disc.
The burn icon is along the bottom.

Burn process can vary depending on your PC, and how much footage you are burning.
I’ve found that a whole two hour video can take up to two hours burning at a slow speed.


Replaying the DVD was easy.
Testing the Import From the Sample Disc
So having a burnt DVD I tested how VideoStudio Pro imports from the disc.

The software is capable of importing from a variety of devices and media. Capture cards are covered as well.

For this example I pointed the software to open the disc.

It clearly saw the chapters it had created earlier and gives an option if I want to import all the scenes or only certain ones.

And in case you’re thinking ‘Can I transfer my DVD movie collection using this method?’.
Stop. You can’t.
Conclusion
Apart from my little niggles of not being able to add .3GP files or exporting to Facebook I do like VideoStudio Pro very much.
- Transform your photos and videos into movies with this easy, fun, creative video editor
- Get started quickly with slideshow templates and smart movie tools using drag-and-drop titles, transitions and overlays
Last update on 2024-05-11 / Affiliate links / Images from Amazon Product Advertising API
It has an intuitive and easy menu system making it exceptional for the average user. The whole idea from transferring captured videos to DVD in as little steps as possible is a dream.
The install of the program also comes with a shortcut to online tutorials if you find yourself getting stuck.
There is a 30 day trial which is plenty of time to play around with all options. Otherwise there is an affiliate link just above for VideoStudio Pro 2019.