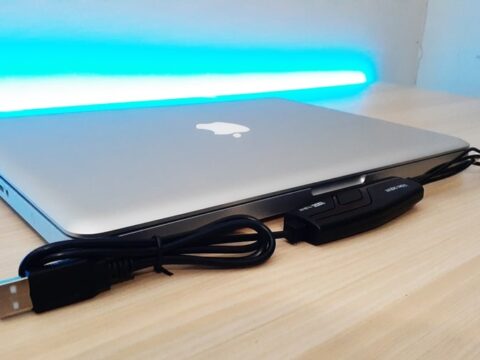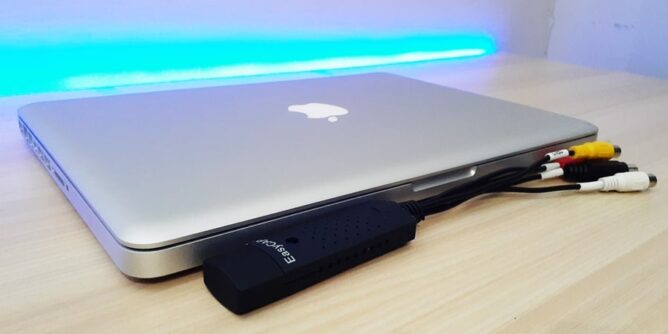
In what can only be described as my trilogy of cheap USB capture sticks to Mac tests, I give you the last one -the easyCAP. In this article I’ll cover the easyCAP for Mac and see if there’s much of a difference between the previous sticks.
I needed to show that these devices can be used for VHS transfers (but obviously under some certain criteria).
The reason I wrote these articles was to at least keep some kind of history showing that there was a way to make some of the various USB capture sticks work with a Mac. Although, running on an older OS being the main caveat.
No products found.
As far as budgets go, the easyCAP is definitely cheap, and cheapness is going to be a factor in quality as well, but if you look at the results, they’re not too bad.
In regards to the two tests that you will see below in the video sample, I initially upgraded my second hand Mac (running El Captain) to Catalina OS straight away, only to find out none of these capture devices ran properly or even at all. So I reinstalled Sierra OS and that’s where I remain.
EasyCAP Connection
Connecting the easyCAP requires the composite cables (Yellow for video, Red/White for Left and Right audio) to be connected from the VCR. Joining these first before placing the device into the USB is recommended.

The easyCAP will light up indicating it is being powered by the USB port.
An advantage I never really looked at before is having the USB connected flat against a table verses dangling from a tower PC. USB connections in general can become loose plus the weight of the composite cables pulling downwards with gravity always had me wondering if the capture would cut out and fail.
Adding easyCAP With OBS Studio
For actual video capturing software, the test will be running on OBS Studio 24.0.2. I also have an article here if you wanted to use QuickTime for capturing . There is test samples to give you an idea if you wanted to use that instead.
Installing OBS Studio is a matter of simply downloading the DMG file and dragging it into the applications folder. It will be ready to open after the install.
You will need to have the easyCAP connected to the Mac at this point so the driver can be found.

Under the Sources Window, click on the plus/add symbol. A large window will open with options of different sources. What we are after is the second last which is called Video Capture Device.
Click on that option. A new window will open asking you to give the capture source a name.

Under the device drop down window, you should see the driver which will be called AV TO USB2.0. It’s interesting to note that it has the same driver as the easier CAP for Mac.
Select OK when you are ready.

In a previous post I mentioned why it pays to have the VCR playing a video as you set up the driver name. If you don’t do this you will only see the black canvas which can appear confusing for the first time setting this up.
Over on the right hand side is a Settings Button.
Select that button.

There are various settings you can change in greater detail by highlighting them. In this test I’ve selected the Output.
In the previous articles covering USB capture devices to Macs, I didn’t change the Video Bitrate, but this time I will.

To increase the bitrate you can either enter a number by the keyboard or simply click on the arrows to increase or decrease the figure.
Under the Recording Format – there are several recording formats that can be chosen, but for this test I have kept it as MP4 to remain compatible with other devices and PCs.

Last thing to change is with the Audio. Make sure the the first Mic/Auxiliary Audio is selected as the easyCAP driver (AV TO USB2.0).
Adding Filters in OBS Studio For easyCAP
Something I haven’t covered at all regarding OBS Studio is the (somewhat) hidden filters feature that can be used to enhance your video as you capture it.

By simply hovering the mouse over the driver name and holding down control as you click (or right click if you have that enabled), a menu window will appear.
Filters is the second from last option.

A new window will open allowing you to add Audio/Video Filters and Effects Filters.

If you click on the add/plus button a new menu reveals what you can add. OBS Studio has built in filters for you to work with but you can visit the community and search for free filters.
The Audio/Video Filters don’t really have additions that you would find yourself using for everyday home video transfers, so I won’t cover those.
I will also point out you might want to test the effect Filters with a test run through, as if you decide to do this while the video is recording, all effects will be in the final transfer.

The lower window has the Effects Filters, which you may find useful although not all of them would be used so I’ll cover just the effects that you could utilize. One thing to remember when adding any of these effects is that they will apply to the whole length of the video.
So for example: you add a color correction to a video because an interior portion of the video is under tungsten lights and appears to yellow, if you fix that portion of the video then any outdoor parts of the video might now look the wrong color.
It’s a shame OBS Studio doesn’t have a simple video editor built in, then it would be a killer software.

Color Correction – Allows you to change the color if the video is too dominant in one particular color. I’d use with caution, unless your whole video was in one setting like a church where the color doesn’t sway too differently for the duration.

Moving the sliders left and right will show the alteration that will take effect.
All the options from Gamma down to Hue Shift can certainly improve the visual quality but I would be doing that in small increments.

Another Filter that could come in handy is the Crop/Pad. What this will allow you to do is crop the video by pixels.

Just remember that this isn’t rescaling the video, this is cropping away the actual video to become a visually different size. What real world use could there be for this?
Maybe if the VCR has a head alignment issue the picture quality can show a fuzziness along the bottom. You could use this method to crop that out and still keep the remaining video in tact.
Just a thought.

Sharpen – As the tool implies, this will add a sharpen effect over the video.

That being said, sometimes having a video too sharp can make the whole thing look ridiculously grainy.
Those are the effects I would use if I was to try and change the quality of old videos.
There are LUTs which change the color tone across the whole video. Some of those could certainly add a nice effect to home videos. LUTs can be found here for OBS Studio.
EasyCAP For Mac Results
As I mentioned earlier, I tested Catalina first then decided to re test the same videos through Sierra. It’s a shame that Mac decided to get rid of support for 32bit apps.
Their choice.
Catalina is absolutely horrendous visually and sound wise. Again if you haven’t upgraded beyond High Sierra then you will be fine.

Taking a closer look at the properties of the video, we can see that even though I increased the bitrate in the settings to 10000kbps, the video itself is at only 8700kbps. Can’t really complain about that.
For 16 minutes the video recorded 1GB of file size. So a one hour video will approximately be 4GB, which is still a decent quality.
Conclusion
For a cheap device it will record your home videos but only if you are running good old Sierra or High Sierra OS.

As I’ve mentioned before, the easyCAP for Mac is not really any better than the easier CAP or the Video DVR. They all will copy over any VHS tapes you have at an acceptable quality. When using with OBS Studio they all can have the quality in bitrate increased, so you’re not losing out there.
It will then boil down to price, in which case this device wins for being the cheapest.
But that’s it.
Quality is still the same as the others. All devices still require a 32bit OS and OBS Studio to work.