In this article we’ll cover scanning large format black and white negatives that your grandparents (or parents) may have owned. Most common consumer film types were 120 and 620 roll films, although some were definitely much larger than that.
I remember when I first started in the photo industry with Kodak, customers would ask me to load their film cameras. 35mm film, I never had a problem with, but large format film use to drive me up the wall.
And yes, there were people still shooting 120 slide film and sending it away to have processed.

For the test samples I’ll be using a few different sized black and white negatives, which also brings me to the type of scanner to use.
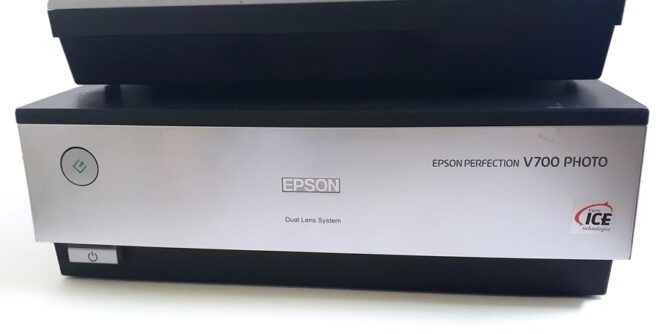
I have access to an older Epson V700 scanner which is no longer made but the Epson V600 will cater for large format negatives mentioned in this article.
Difference Between Large Format Negatives and 35mm Negatives
In a previous article called how to scan slides using an Epson scanner I covered my affinity for Epson flatbed scanners and I still stand by that. They take scanning negatives and slides serious.
Take a look at the following list of negative scanners from Amazon. All of these are fantastic for scanning smaller 35mm negatives.
No products found.
They cover the bases for the popular formats but not the larger formats you might own and to give you an idea of the sizes that older negatives can be:
So this is why I prefer the flatbed scanner. It covers everything.

On the Epson V700 (and V850) the whole glass panel is used for scanning of negatives.

Using the supplied negative carriers you can scan up to 24 individual 135mm negatives (assuming you had 4 rows of 6).

Using an Epson V370, the scanner only caters for 6 individual 135mm negatives but not the larger format. The scan light only goes through the center.
Scanning Large Format Negatives Using an Epson Scanner
Let’s take a look at the negative carrier for these type of scanners.

A carrier like this can hold several sized negatives. They can fit lengthways or simply across the gate. Whichever way that will hold the negative comfortably allowing you to close the gate down and click into place.

Can anything happen if the gate isn’t locked into place? Not really, the scanner will still commence with a preview, but the negative may look out of focus if it’s not sitting in correctly.
The negative sits in the carrier with the emulsion side facing up. Don’t worry about light shining through the remaining empty space. It won’t affect the scanning process.
There are three different scanning options with the more professional Epson scanners. Those options are Reflective, Film with Holder and Film with Area Guide.
So what do all of those mean? Reflective is for scanning photos. Film with Holder means the scanner will detect where the film edges are. Film with Area Guide means the scanner will show the whole glass plate and it is your job to trace the outline of the negative.
The reason I bring that up is that sometimes it’s just easier to do it manually than let the scanner preview the image incorrectly, especially if you have an under exposed negative.
It’s like watching a robot card trick at times.
Is this your image? Nope. Scan again.
Is this your image? Nope, not even close.

That being said, the Epson scan software is a fantastic piece of software, not only for its color correction options but for letting users work their way up in confidence with scanning. As long as your negatives are well exposed in the first place.
For this example, I have the scan mode set to Professional Mode.
The Document Type is selected as Film With Area Guide.
Once the preview has finished, I simply trace a rectangle over the negative and the image will highlight in the preview.
Now I’m not limited to that drawn rectangle, I can adjust any of the sides to be more accurate. I can move the highlighted target up or down or duplicate the size, spreading them over the remaining negative areas (the dark shades).
I’ll finally select a Target Size, in this case it was 6×4 inches, and choose the file type and dpi.

The Image Format was chosen as Tiff and 300 dpi.

The result is a large clear file.
Can You Scan Black & White Negatives On A Flatbed Scanner?
While the answer may seem clear that you cannot scan negatives on a flatbed scanner, I think it raises more questions simply like: why not? What happens if you do it anyway?
What do the results look like? I think that’s the important question.

If this was your only option for scanning old negatives, then whether they are facing the right way up is the last of your problems. If it was scanned back to front, it can be simply flipped around easily in a photo program later on.

First things first, the Document Type has to be selected as Reflective as if your scanning photos.
Clicking the preview will show you how the negatives appear under the lid.

Tracing an outline around each negative will highlight the image. You could change the Target Size (I did for this example to 4×6) and the dpi resolution.
Clicking Scan will commence the scanning.
Using Photoscape To Correct The Image
Because the scanner has scanned the negative exactly as it is, you are going to need a program to do the final editing.
If you already have knowledge with Photoshop, then you will know how to invert and try to get the best result from the scanned image.
But if you are not interested in Photoshop I always recommend a free program called PhotoScape which can be installed on your computer and doesn’t require an internet connection to use.

With the image loaded into Photoscape, the tools that you will use are along the bottom.

The first tool to use is the INVERT TOOL. This reverses the pixels colors. If you have a color image it will turn it into a negative.
If, on the other hand, you have color scan of a BW negative, clicking the invert icon will change it to black and white.

For this test I used the AUTO LEVEL, which didn’t make much of difference but you can use LEVELS and a HISTOGRAM to do better adjustments.

So what results can you expect from simply scanning negatives on a flatbed scanner? I’m afraid to say, not much.
If you didn’t know what the negative actually looked like, you would probably think this was how it should look.

But this is how that same image should look. Such major difference.
Personally I would not recommend scanning any precious negatives just on a flatbed scanner. You’ll get an image, but certainly not the proper clear image as it should be.
Conclusion
If you don’t have a lot of negatives to scan you can go the route and get the professionals who will do 120mm Negative Scanning Starting At $1.95!
If there were one hundred negatives to scan that’s still only $195 compared to $500 for a high end scanner.

If you do any sort of family tree preservation, scrapbooking or simply want to preserve old large format negatives you have stored, I recommend getting them digitized one way or another.

